
Once you’ve built a mining rig, you begin to realize that most of the job is actually about keeping your VRAM temps and the GPU cool. Mining is hot work and, as we all know few if any GPUs out of the box are thermally padded well enough to keep low temperatures.
Anyway, I’ve re-padded pretty much every single GPU I own at one point or another. I’m quite tired of measuring, cutting, placing, and re-pasting – although I do enjoy the results when I get it right.
If at first, you don’t succeed
Something that not a lot of people on Youtube say in their re-padding guide videos is how many attempts did they make before they got it right? In my opinion, GPU PCBs and coolers are made to extremely variable tolerances which means that the same make and size of the thermal pad on one board might just be too thick or then to work on another from the same manufacturer. There are sometimes several attempts on troublesome cards to get to the right answer.
I spend a long time problem-solving in advance by measuring. The biggest question you’re trying to answer is what is the difference in height of the surface of the GPU to the top surface of the VRAM? The answer gives you your approximate pad size for that section of the pcb.
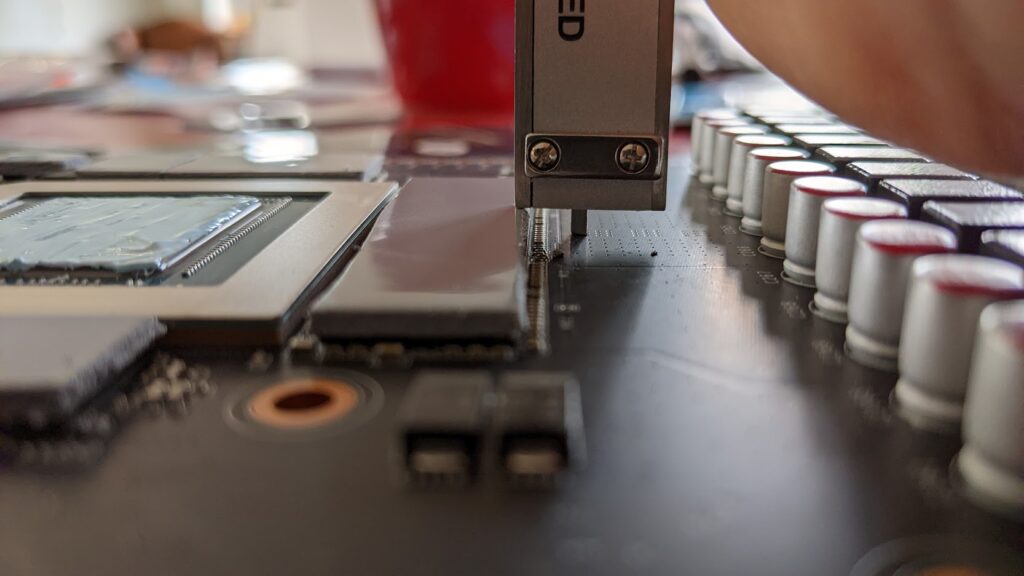
I spend a good while making measurements – in the photo above I’m using my Vernier to gauge the height of the VRAM and padded chip from the PCB. I also know the height of the GPU surface from the PCB. The trick is to overshoot the GPU height by a *tiny* amount (a few tenths of a millimeter at the very most!). It’s worth pointing out that the GPU itself is usually slightly proud of the surround. So it’s a mistake to make a thermal pad flush with the GPU die outer – the GPU chip itself may be a few tenths of a millimeter taller!
When you screw the board into the cooler you want the pads to squish down allowing the GPU perfect contact with the cooler. Often, you’ll see people reporting fantastic new VRAM temperatures after a re-pad, but the GPU temperature has shot up. The explanation is that the pads are too thick, and the VRAM is making great contact at the expense of the GPU being cooled.
And no, more paste on the GPU is not the answer!
Most of the time, Reddit is your friend – there are only so many boards and coolers and usually, the generic advice is fine. On a 3090 re-pad, for example, you’re always going to need 1.5mm pads (I only use Gelid Extreme) on the VRAM and 2.0mm on the little VRM chips on the GPU side of the board. Paste wise I use either MX4 or 5. I prefer MX5 but it’s thicker so you need to make sure you’re not using too much and that you’re spreading very evenly. I like 3090’s – they’re easy to work with if a little power hungry.
3080’s though, are always a pain. I think there are several Founder’s Edition variations in VRAM to GPU height, so you really need your wits about you. The image above, in fact, ended in disappointment so I turned to a new approach – a copper plate:
The principles I’ve described above apply in exactly the same way when you’re using these plates. You’re looking for the copper to be no taller than the GPU. In the case above I found a small difference (the plate was 1.47mm thick, I needed something with a thickness of 1.6mm to be absolutely perfect). But of course, paste on the VRAM and later, paste on the top side of the cooling plate mops up the movement and any potential variation.
This particular card was a gamble – a 2nd hand but very cheap 3080 FE from eBay. eBay sellers don’t sell their best cards first so I knew I’d be buying something with problems:

102c – and that was within seconds! But look at the GPU temperature. By any standard, that is cool. So the problem above is very clear, the VRAM is not making contact with the cooler but the GPU is very clearly tightly pressed against it.
Initially, I rebuilt the card with the standard pad sizes and to my disappointment, I ended up with the same results, high VRAM, and low GPU temperature. I was looking for something to fill a 1.67mm gap – clearly, a 1.5mm pad wasn’t going to work.
But a 2mm pad, even squashed down hard, was far too much. Cool VRAM, very hot GPU. Very frustrating!
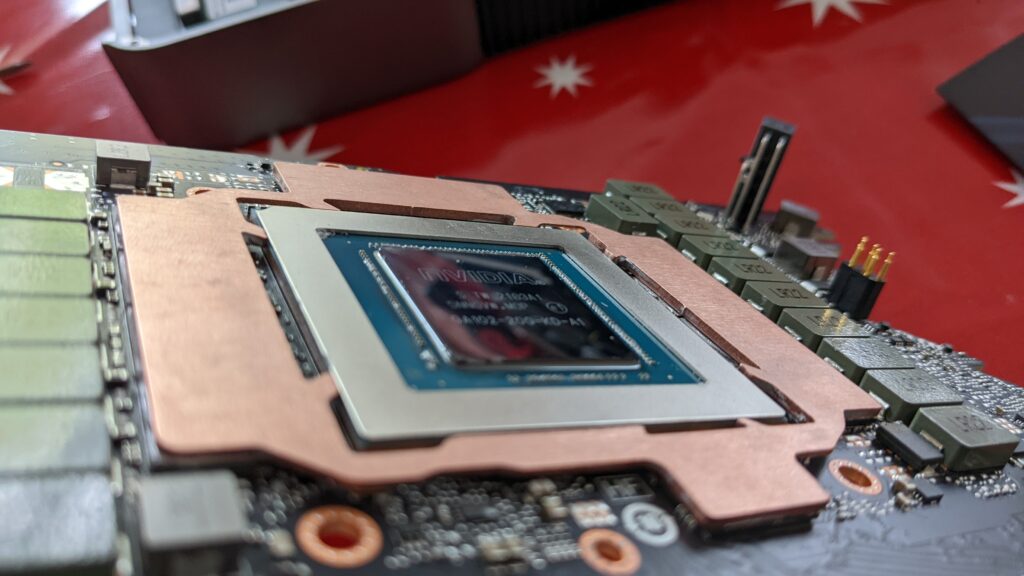
So I took the opportunity to try a different approach – a coolmygpu.com copper mod plate:
If you look very closely you’ll be able to see that I’ve used paste on the VRAM chips to hold the plate in place. Before I’d done that I was very conscious of “dry fitting” the plate and checking for any potential shorts. You are, after all, seating metal over a very expensive little computer!
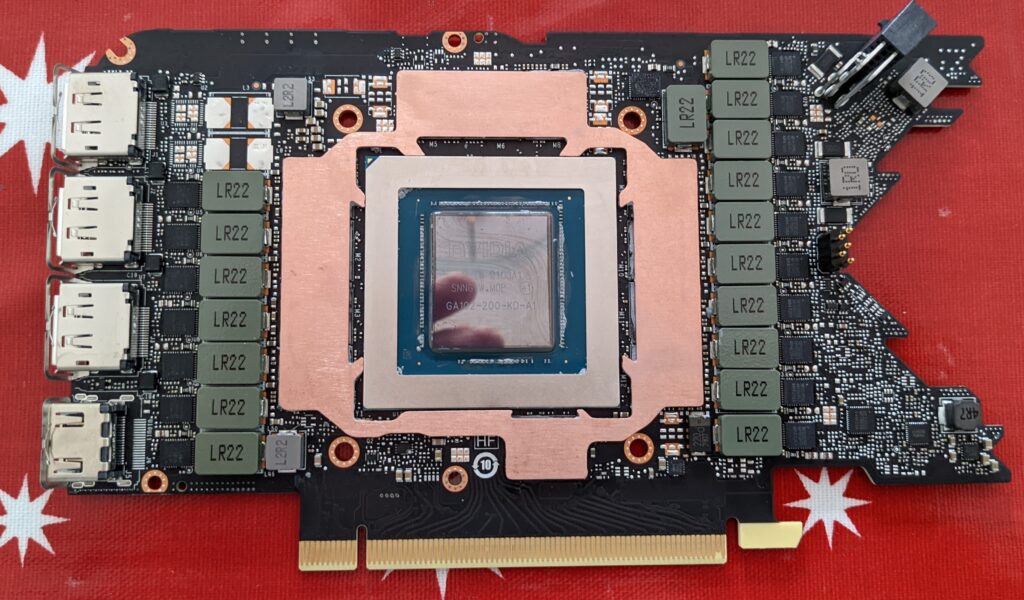
Satisfied that all the clearances are good, I pasted the VRAMs and placed the plate. Pasting VRAM is a new game to me – what I’ve understood from my experience so far is that using too much risks the copper plate sitting too high above the GPU. So, I was careful to cover each chip, but spread it thinly and evenly. Once these plates are on, you can’t just pull them off or they’ll bend.
I re-padded the VRMs with 1.5mm pads and re-pasted the GPU in the usual manner. I then pasted the top of the copper cooling plate.
The best way to ensure contact with the cooler is to seat the PCB into the cooler and then gently lift it back out to see if there are any issues. In my case, some of the copper cooling plate needed a little more paste. But the GPU was nice and square and made good contact with the cooler.
And, here are my results:

This 3080 will sit at these temps all day, granted – the GPU is hotter but within tolerance. The VRAM is so cool! In retrospect a tiny bit less paste somewhere on the copper plate would have avoided this. I think a very even spread of thermal paste is of vital importance.
Conclusions
So, this copper plate gave me an opportunity to make some fine adjustments using the last application of thermal paste around the VRAM chips. I deeply suspect that this particular board was malformed in manufacturing, almost like the runt of the group. I also think the eBay seller knew this and couldn’t fix it, so I took great delight in sending her the before and after shots.
Copper modding requires a more detailed understanding of the measurements of the board. Specifically, the gaps you’re trying to fill between the VRAM and the cooler *without* compromising the GPU contact with the cooler. This is not difficult but its a new kind of attention to detail that pads have allowed us to largely ignore. Copper modding is very different from the usual re-pad procedure that most of us can do with our eyes closed now. So proceed with eyes wide open!
Critically though; it does work. And, provided that you’re very observant and double checking each step, it’s hard to go wrong. I really like the approach that the guys at Coolmygpu are taking, but as a caveat: most cards and manufacturer coolers have different tolerances and dimensions. It would be great to see (as an example) the thickness of the copper plate in the product specifications on the website. And more up to date images! But, I’m a fan and that’s not a complaint – if you’ve got a problem card that you’ve been meaning to re-pad, why not try a copper plate instead. Just proceed carefully and thoughtfully the first time.