
How does anyone get into mining Bitcoin? Or, into mining any other cryptocurrency for that matter! For me, this started because I own a gaming rig.
I’m very much into sim racing and own a gaming PC with an NVIDIA 3090 RTX FE. Having discovered Nicehash, I quickly fell down the slippery slope of always checking VRAM temps, Afterburner OC settings, watching my PC’s power consumption – at least until I’d found quite an interest in the subject.
Since then, I’ve been learning how to build, improve and optimize my own mining rig(s).
The first article I’m writing is very much aimed at sharing the lessons I’ve learned as a first-time builder. If you’re interested in cryptocurrency mining but you’re not sure where to start, I’m hopeful that I can help you learn from the hard lessons I’ve had to take as I progress myself along the journey of building a proper mining rig.
I’ll be completely transparent about the problems I’ve found, and where I could have saved time and effort, and of course – money. I’ll point out where, if I was building this rig again from scratch, how I’d do things differently next time. And, there are many things I would do differently!
What this article is
For my first post, I’m going to document the build of my 4 x water-cooled RTX 3090 rig. Right now, it’s hashing away and, I’ve added an RTX 2080 ti into the mix until a few more cards arrive.
I’ve seen so many posts in Facebook groups of pictures of burned PCIe cables, “dead” motherboards, GPUs detected but not hashing that I honestly think there are a lot more of you out there that are keen to learn. And that’s without being given a hard time about it!
What this article is not
I’m not going to jump in at the deep end in terms of what mining software to use. I’m about to start building a second rig upon which I’ll be running at a slightly more advanced level! But we all have to start somewhere and for now, I’m going to concentrate on documenting the build.
Software, optimizing, managing all of the aspects of owning a mining rig will come very soon.
A caveat
I’m pretty sure I’d like to rebuild this first rig using what I’ve learned.
The rig works, and I’m happy with the outcome and performance. But there are some loose ends to tie up; cable tidiness, a motherboard standoff to tighten here and there. It isn’t perfect to look at – it looks more like it was spawned on a Borg cube!
But that’s half the fun of being a hobbyist, you learn and improve as you go. I very much appreciate the skill professional miners have amassed over many years – it’s difficult to get everything right the first time.
Watercooling by happy accident
You might have noticed that my 4 3090’s are all water-cooled cards. I didn’t originally intend to build a water-cooled anything – but I came across a deal for 2 Zotac Trinity 3090’s that happened to have water blocks fitted.
How hard could that be to build? As I’ll show you later it adds an enormous amount of effort for a first build; even if (like me) you’ve had experience building your own gaming PCs, building a mining rig is a different universe entirely. The outcome was good; I’m delighted with the VRAM temps on the 3090’s. Watercooling makes everything a fair bit harder but as a challenge, it’s an interesting one to have.
The kit list:
GPUs:
- 4 x
RTX 3090 ‘s - 1 x 2080 RTX ti
PC:
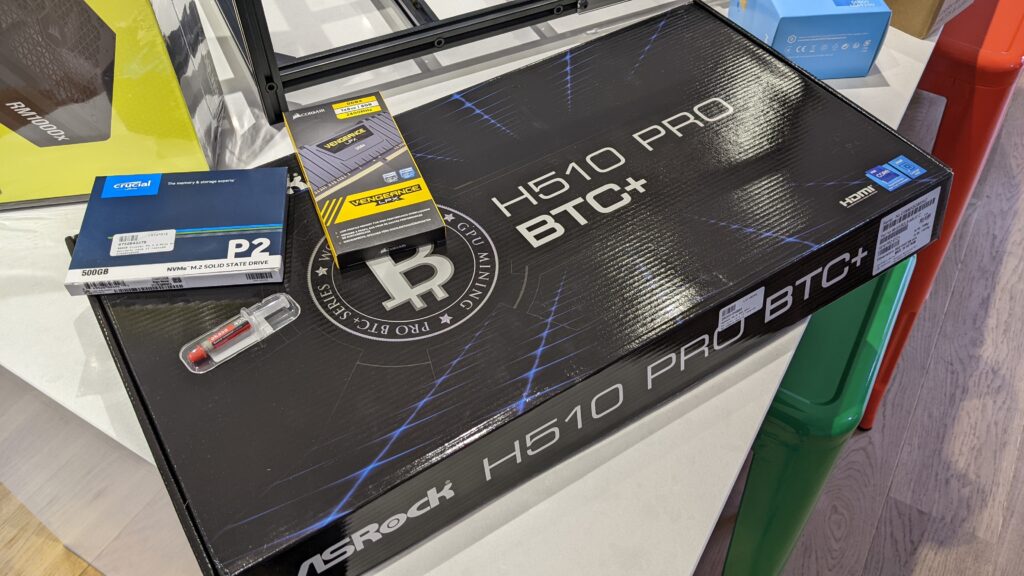
ASRock H510 Pro BTC+ Mining MotherboardIntel Dual-Core Pentium Gold G6605 Comet Lake CPUCorsair Vengeance LPX 8GB 2400MHz DDR4 Memory- 2 x
Corsair RM1000x 1000 Watt Fully Modular 80+ Gold PSU/Power Supply 240GB M.2 2280 SATA 3D NAND SSD - 6 x
Noctua NF-F12 iPPC 3000 PWM 3000 RPM fans
Chassis:
Veddha T2 6 GPU 8 GPU Minercase- Modified with 2 x 600mm 2020 profile and brackets
- Various additional standoffs and t-nuts / slide bolts
Watercooling:
- EK Water Blocks EK-CoolStream PE 120 (
Single Fan Cooling Radiator ) - Radiator14 x EK Water Blocks
EK-Quantum Torque STC 12/16mm Soft Tubing Compression Fittings - 5 x EK Water Blocks
EK-Vardar X3M 120mm (500-2200 rpm) Fans - EK Water Blocks
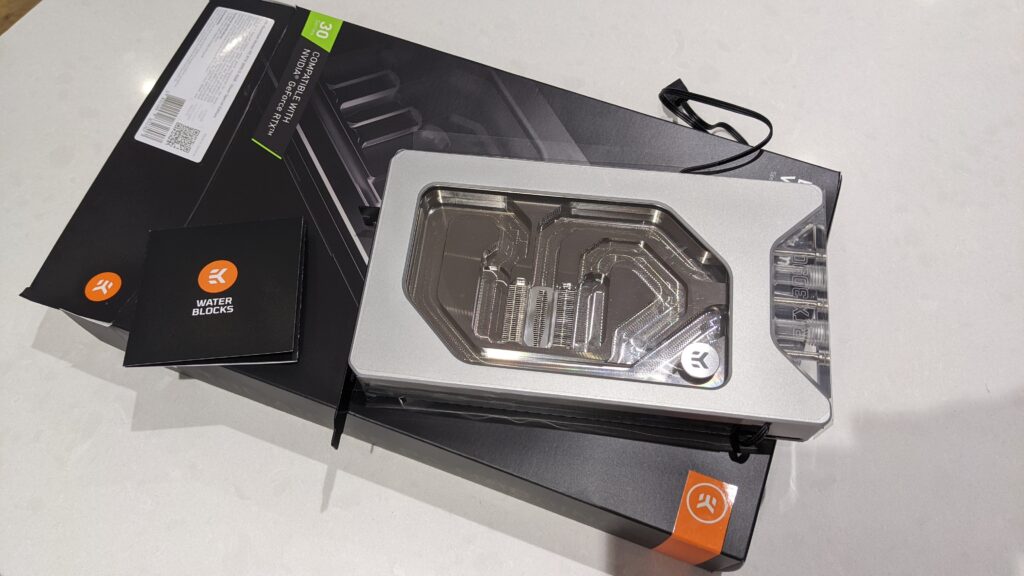
EK-Quantum Vector Zotac Trinity RTX 3080/3090 D-RGB Water Block - EK Water Blocks
EK-Quantum Vector Zotac Trinity RTX 3080/3090 Backplate - EK Water Blocks
EK-Cable Y-Splitter 4-Fan EK Water Blocks EK-Tube ZMT Matte Black 16/11mm (soft/black – 3 Meters)- EK Quantum Kinetic
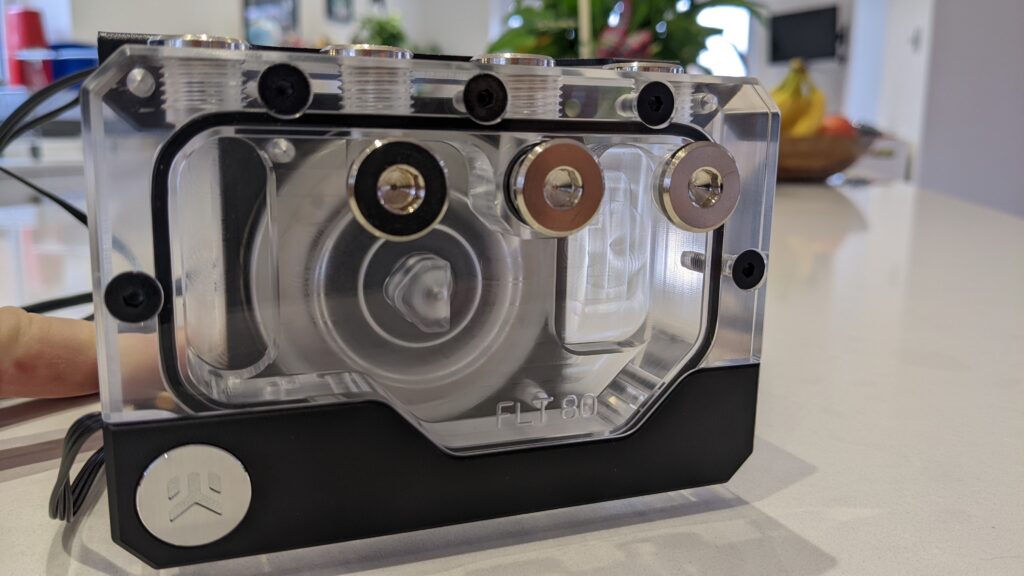
FLT 80 D5 pump 2000ml Cryofuel EK Coolstream PE 480 radiator- EK
Quantum Vector FE RTX 3090 RGB cooling block
Getting started on the Build
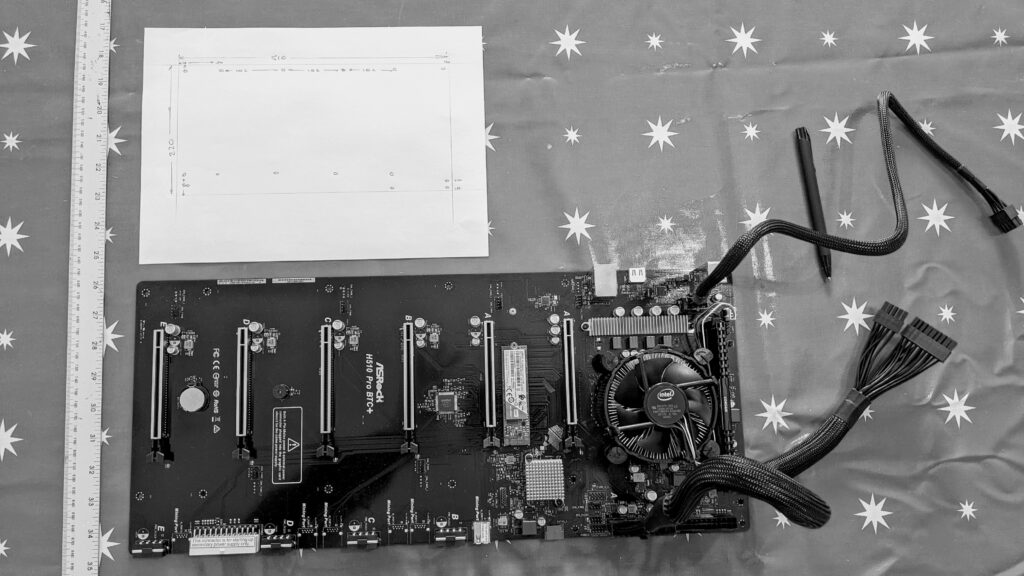
Finally, I have all the bits in a pile in the office and my first discovery isn’t ideal: the motherboard turns out to be longer (and not really an ATX motherboard at all) than expected.
So, the first lesson is to make a note of all of the dimensions for the fundamental items and don’t make any assumptions, preferably before buying!
My original plan was to mount the motherboard on the bottom deck of the chassis, but of course given the size of the thing it had to be mounted up at the top.
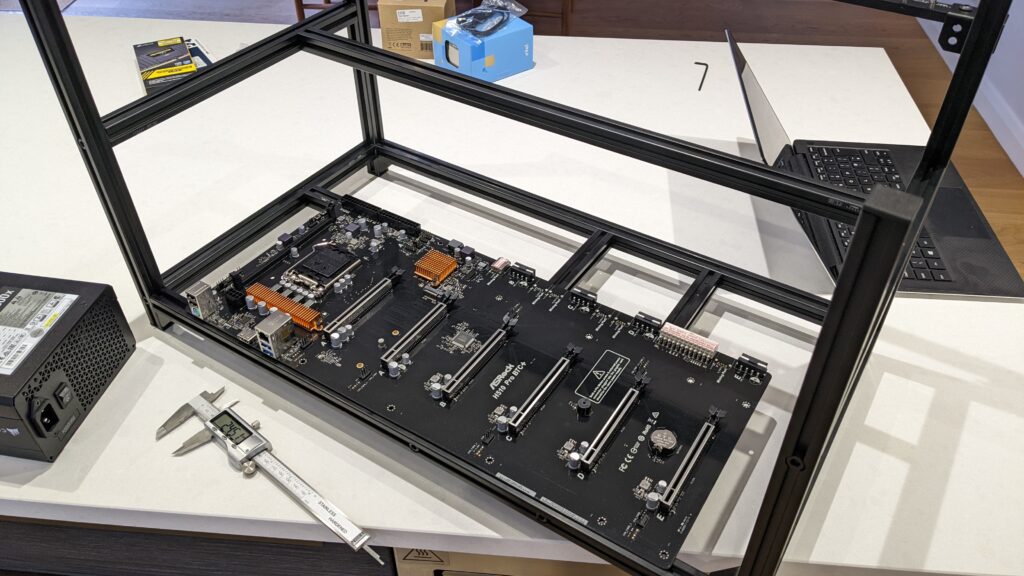
Because the H510 board has 6 full PCI-16 slots, I could seat the GPUs directly into the motherboard. This approach has two benefits – no risers, and in principle, the cards could be more secure if mounted in a full PCI slot. Fewer cables would be good too.
In a way, this outcome was inevitable: I’d be left much more space to deal with the PSU’s and water cooling on the base of the rig. Or as I like to think of it, the engineering deck!
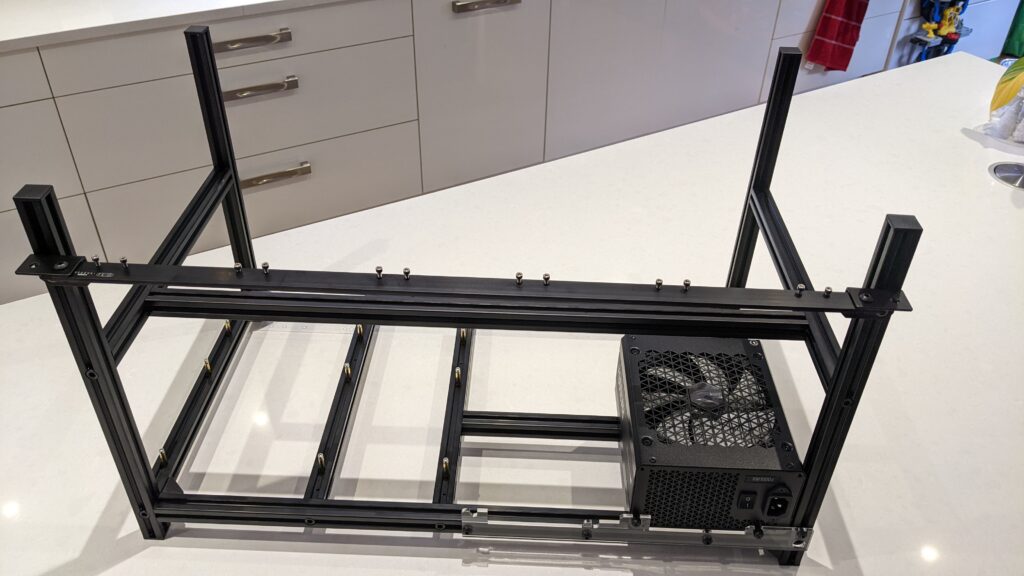
So, all of that meant I’d need to make some changes to this mining frame from Veddah. By adding 2 x 600mm profile bars along the top, I’d be able to mount the motherboard on proper Motherboard standoffs. The board would be far more sturdy and secure, and to an extent would be grounded correctly.
Building the mining frame was reasonably easy, albeit a little fiddly the first time round. The manufacturer claims approximately 20 minute build time, I think the 2nd one would take that long. The instructions are OK but not perfect, so you’re left trying to work out what’s going on before you start. I found that placing everything out in front of me was helpful enough – there are little markers on each piece of 20×20 aluminum profile that tie in with the instructions.
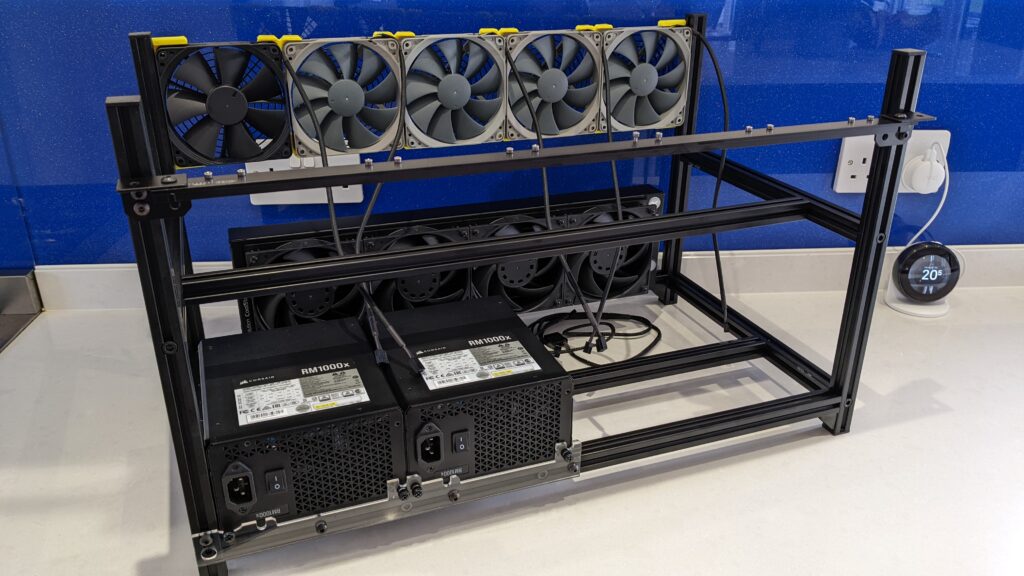
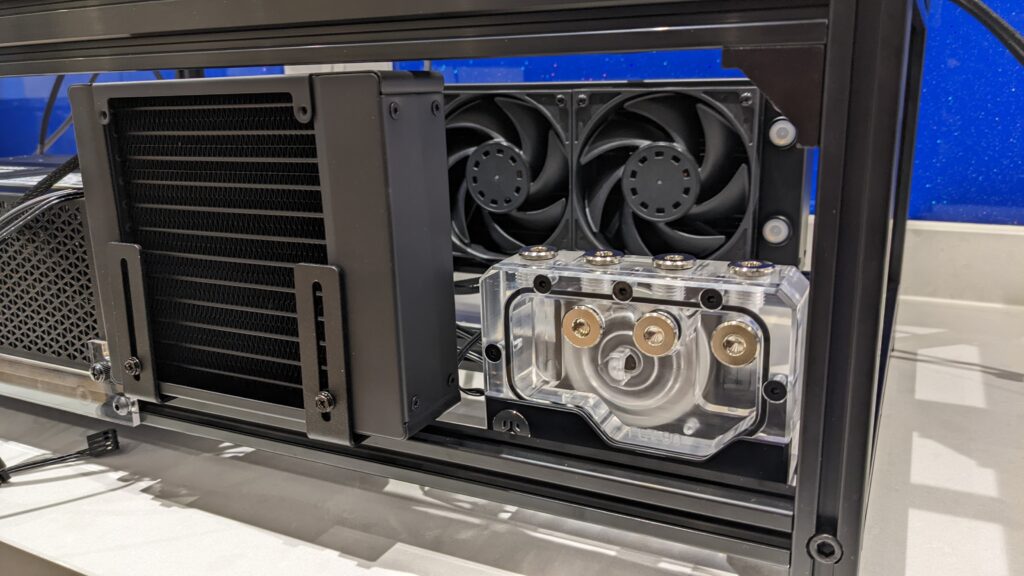
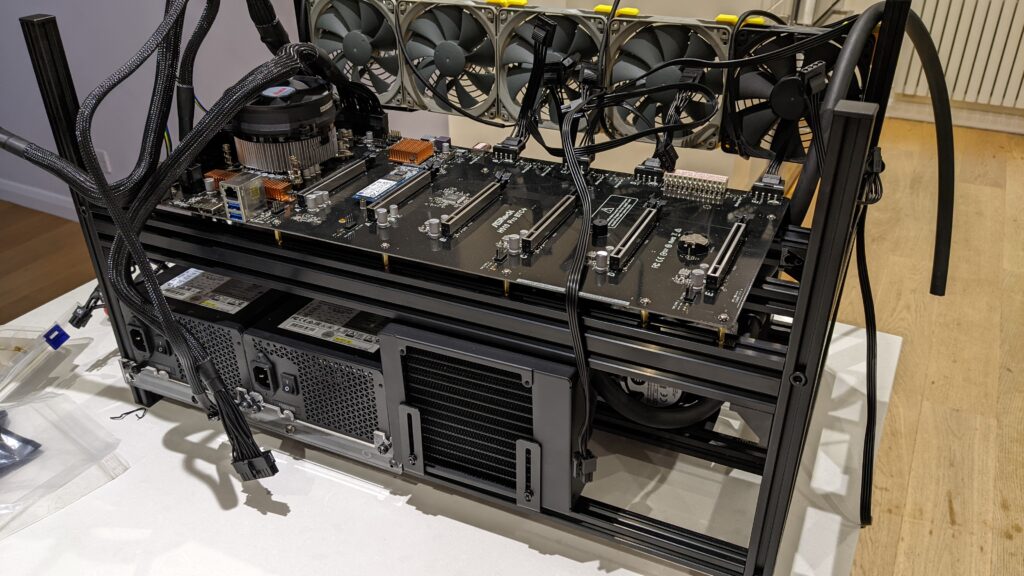
As you can see in the picture above, the PSU’s are held in place by a bit of perspex that comes supplied with the mining frame. It accommodates 2 PSUs – a pair of Corsair RM1000x units in my case. If an RTX 3090 uses approx 300w while running (before optimizing) then there should be enough headroom for one more, smaller GPU on each PSU. A 3070 for example uses just over 100w. That’s enough headroom and enough left for the Motherboard.
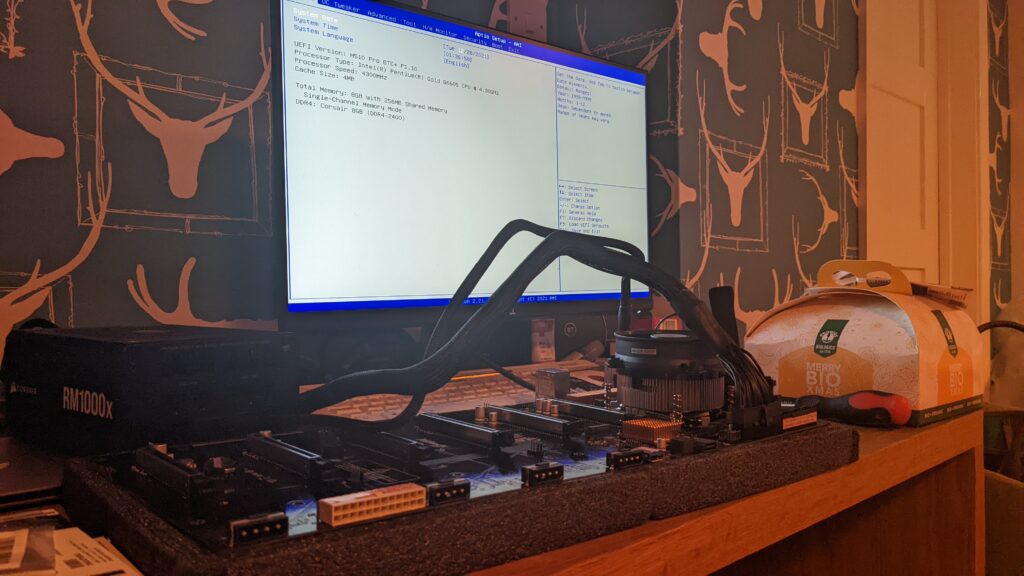
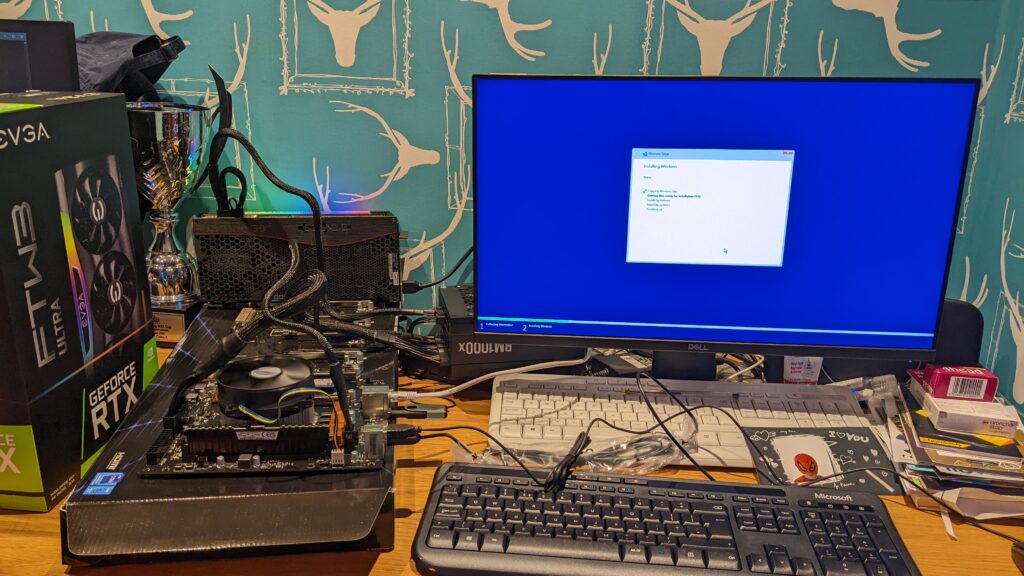
Motherboard test
Having read some frightening Reddit posts about this Motherboard, I thought it best to set it up, install Windows and get it hashing briefly so that, when all of the Watercooling gear had arrived I could just fit it and get going.
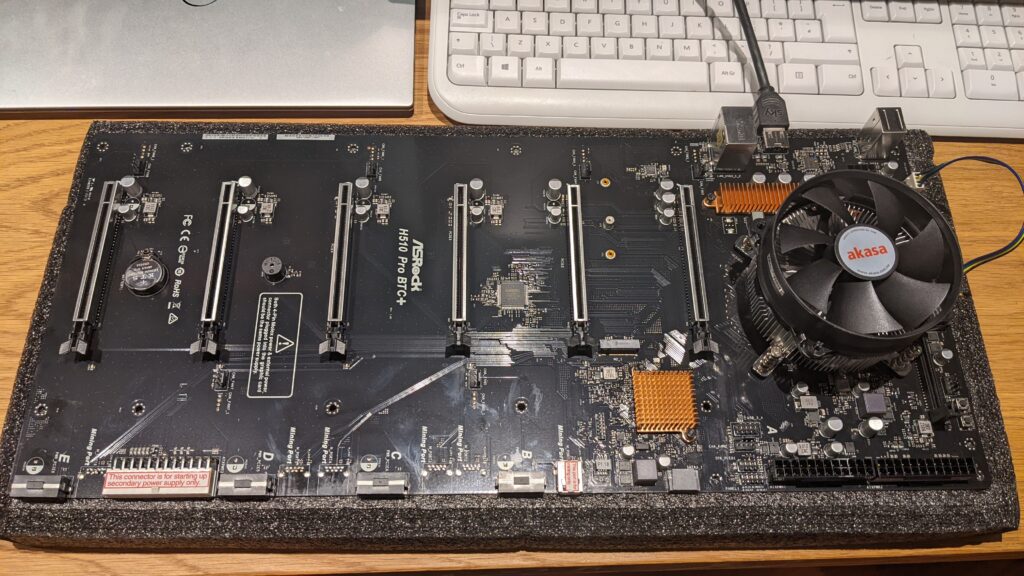
So this bit is of course very trivial. There are plenty of fan pin headers all over the board, a single HDMI port, LAN and 4 USB sockets. I installed the CPU and fan remembering the thermal paste and fan connection. I installed the ram and powered at that point to make sure it booted into UEFI. Which, it did!
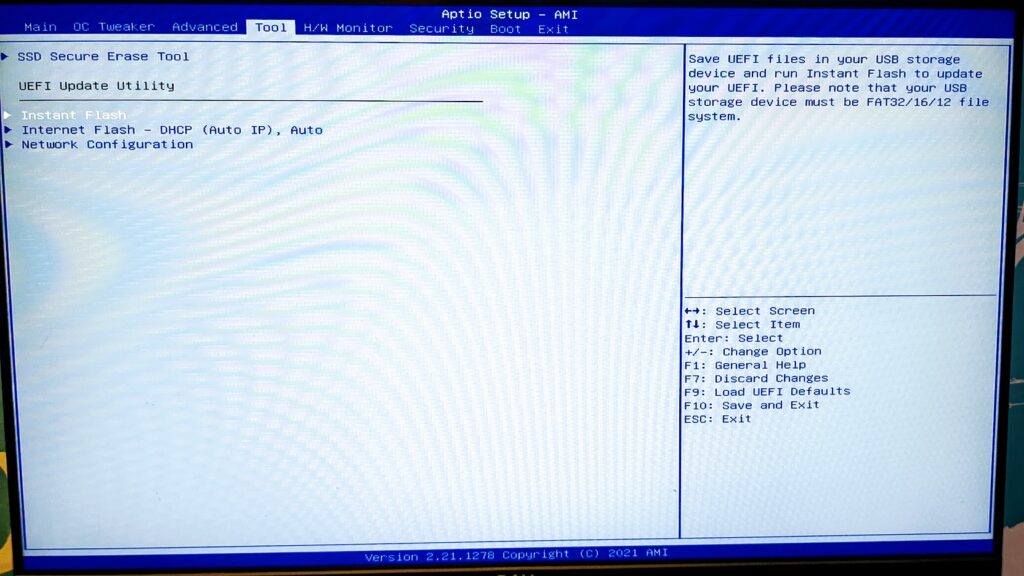
Most if not all of the advice with this board is to flash the bios to the latest version (found here), before you get started. To be able to update the bios, you need a USB key (no larger than 32GB) that you can format to Fat32. Anything bigger, and the motherboard won’t recognize the USB stick.
Once you’ve updated the bios, you can update the settings best for mining:
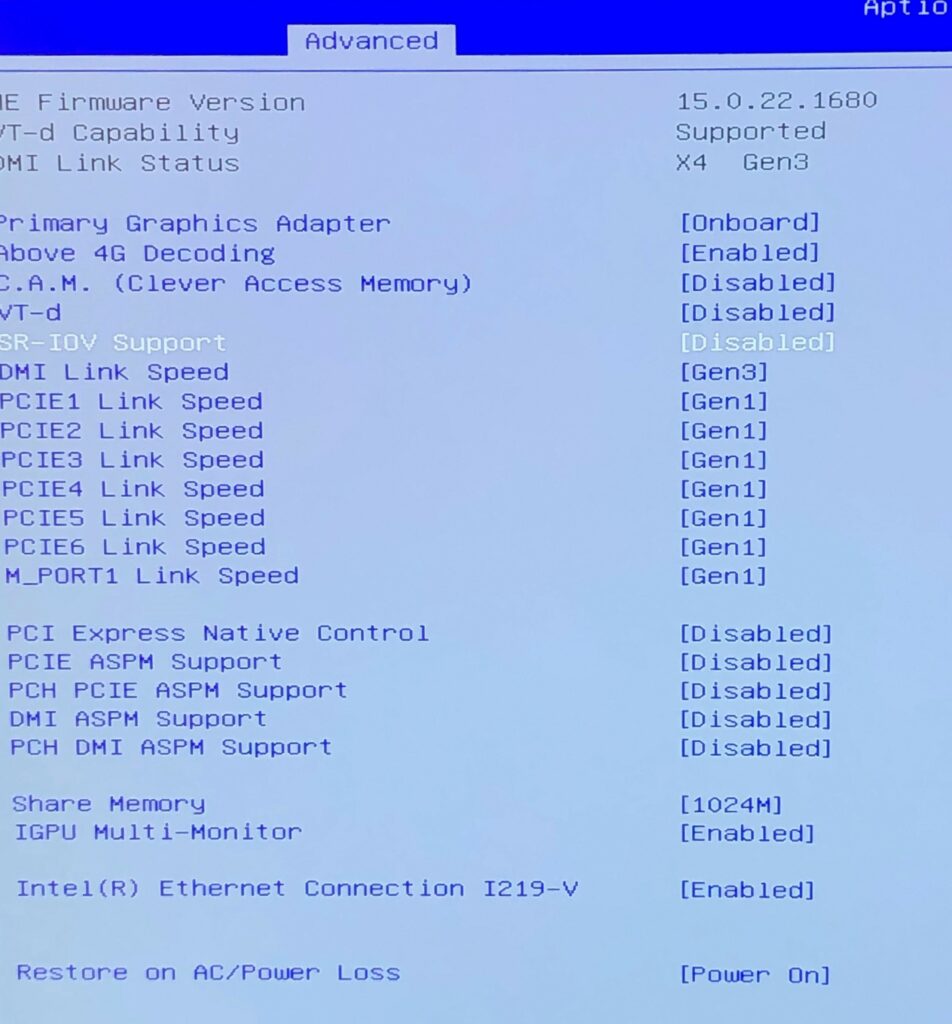
Once these settings are saved, I shut down the motherboard and installed the SSD. On powering it back up, the SSD was undetected. I realized my mistake – I had an NVME M.2 SSD, but, of course, the board doesn’t support NVME, SATA only. A replacement SSD was ordered for next-day delivery! This was an entirely avoidable delay, had I read the motherboard specs properly.
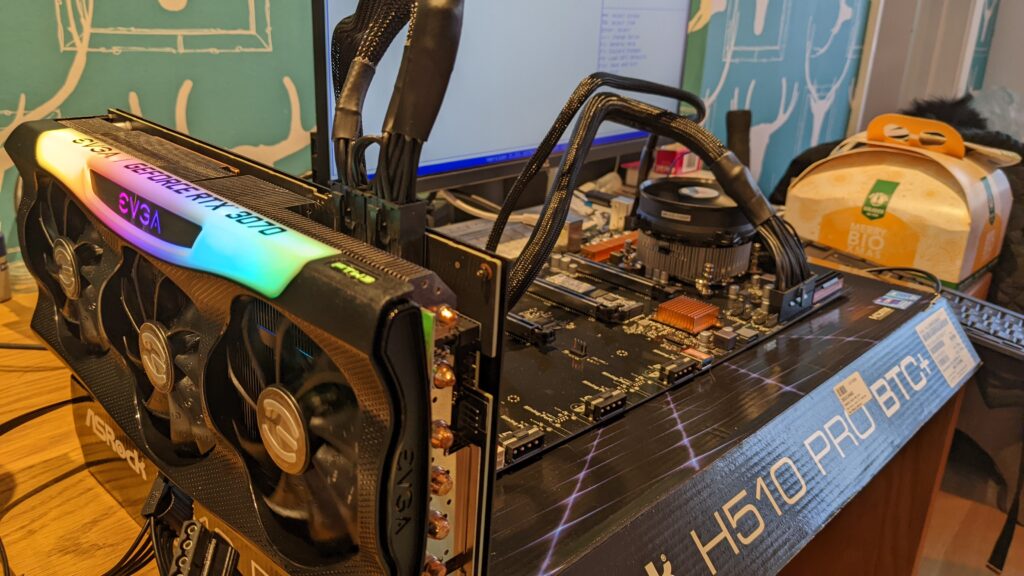
Asrock H510 Pro BTC – lessons learned
This motherboard is pretty unusual compared to the usual ATX units I’m used to. Firstly, it’s way too flexible in hand. Under the weight of a few GPUs, even mounted, it can flex. Not ideal for longevity! So I’d advise treating it with kid gloves.
Can you see the Molex sockets along the edge of the board in the photo? That’s how PCI-E slots 3,4,5 and 6 are powered. Most PSUs come with a few Molex to 6 pin PCI-E cables. A single cable is sufficient to power a single PCI-E slot as PCI-E 6 pin power is rated at 75w. But don’t be tempted to daisy these connections or cable overheating might occur.
At boot, you get a little diagram of all of the slots. If a card is installed and working, the slot will be green. If there’s something wrong with the power to the slot or the power to the GPU, the onscreen image will show the slot as an amber color. And, a red led lights up next to the slot on the mainboard. Most of the time you can resolve the issue by having a close look – I had this issue because the extra two-pin connector on the 6×2 pin PCI-E plug hadn’t gone into the socket all the way.
After I resolve that issue, the red light stayed on and the GPU still wouldn’t detect. It took a CMOS reset to fix the problem.
Generally, though it’s a good board that just requires a bit of care and thought to get working well. If you’re a beginner just take care and do things one at a time.
Setting up the fans
Installing the fans on the radiators was a relatively trivial job, although the radiators also need brackets placed at either end of the radiator. As the brackets use the fan mounts, it can leave the fans sitting unevenly across the radiator. The solution was to use washers where relevant to make sure the fan bodies were unable to twist out of shape once screwed down
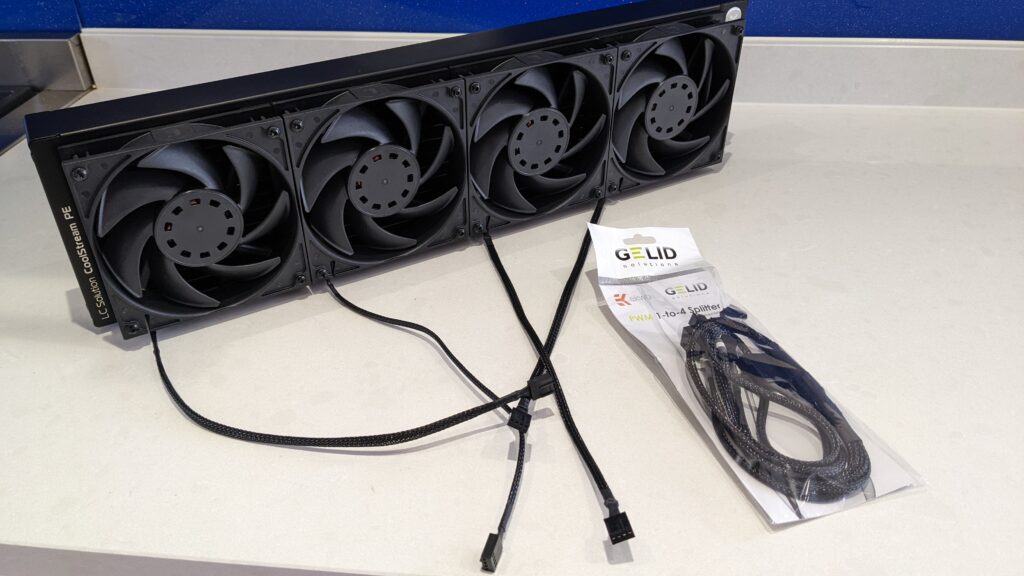
Something to be aware of, just make sure you’re using the correct length screws when you’re fitting the fans. The radiator fins are copper, and very fragile. It wouldn’t be a good idea to screw down into your radiator!
At the last minute, I decided to add a single 120mm radiator too, to cool the water before entering the pump. A D5 pump has a preferred maximum operating temperature of 60c – to be safe, my loop goes from the last GPU into the 120mm radiator and then to the pump before entering the 480mm radiator
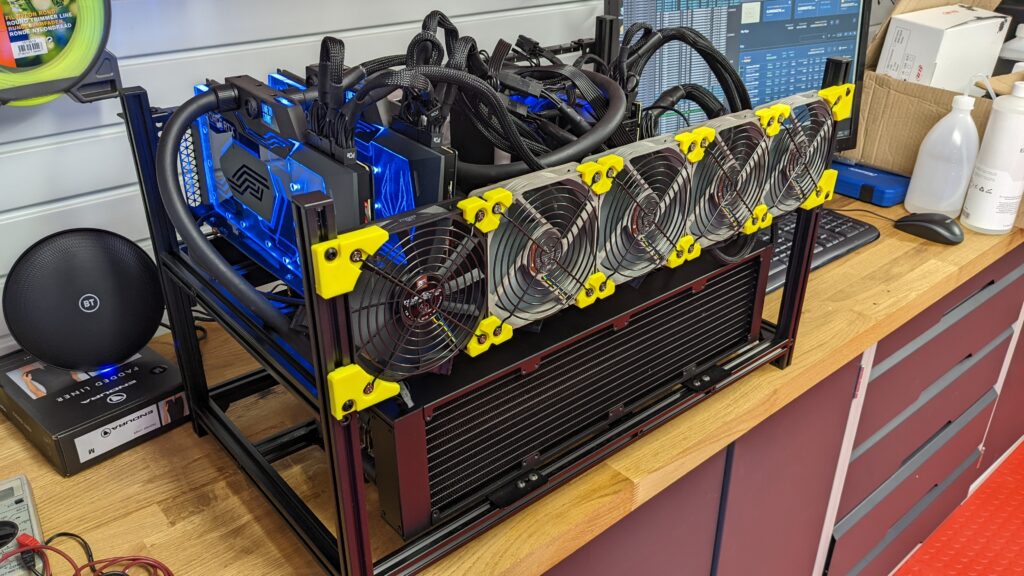
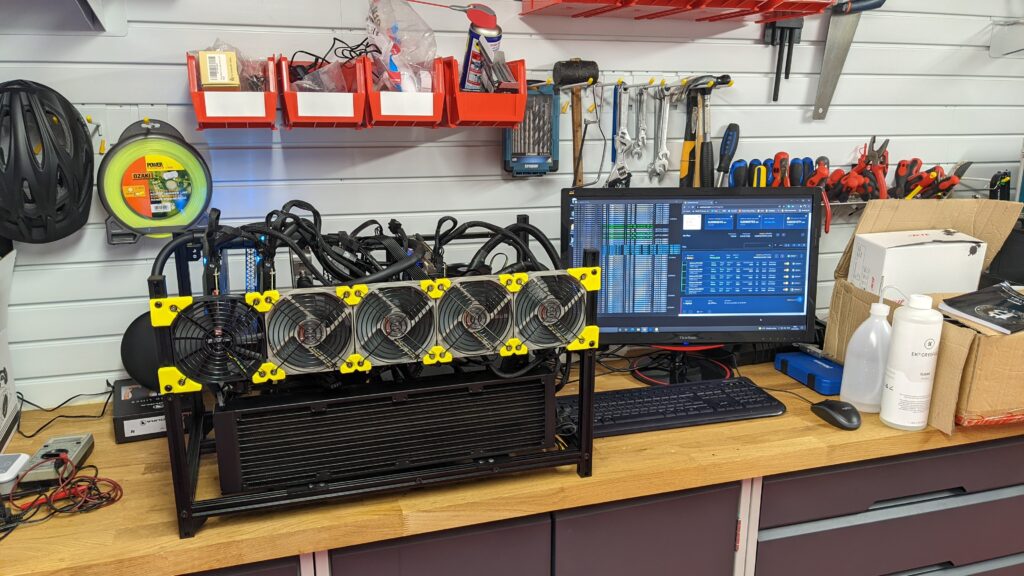
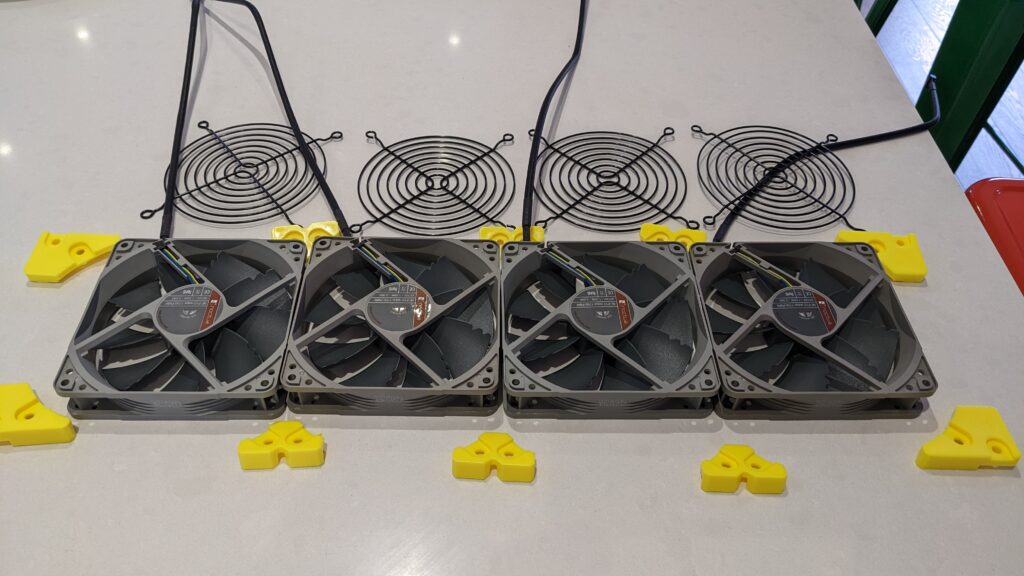
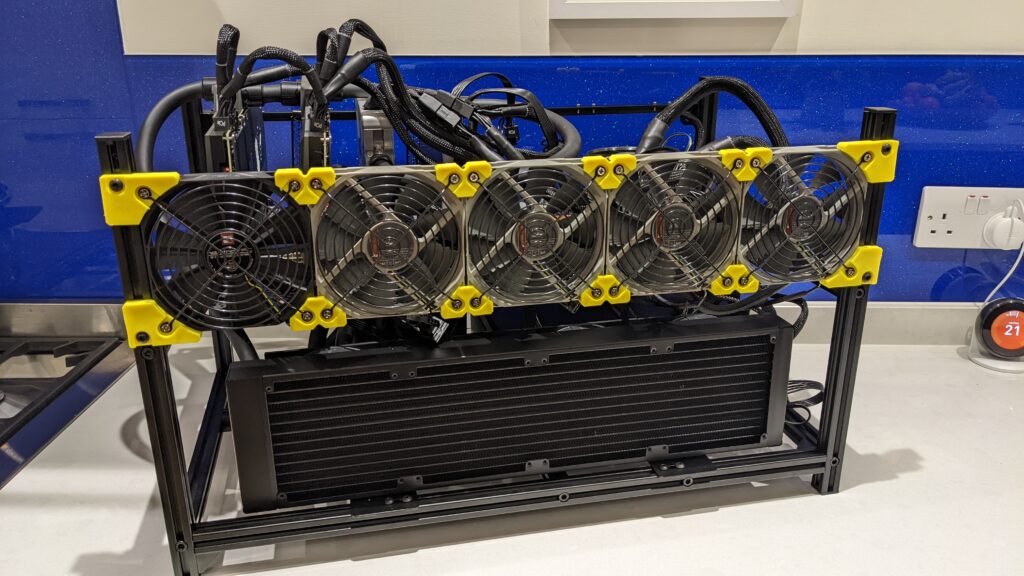
Despite water cooling, I’ll still need airflow across the motherboard and GPUs. So I use the supplied 5 fan mount kit and assembled the array. It’s far easier to lay everything out before you assemble. Obviously, I missed the 5th fan for the photo…
The finished item:
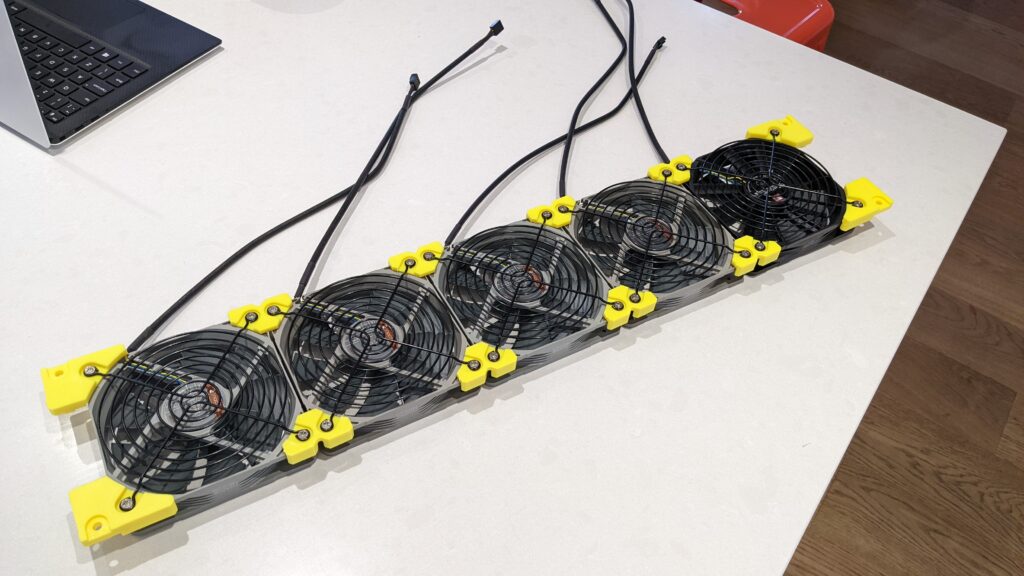
The motherboard has a lot of fan power pins – there’s more than enough for each of these fans to be powered directly by the motherboard. The 120mm radiator fan is powered from the motherboard too, with the larger radiator fans powered by the PSU via a Molex 4 fan splitter cable.
Setting up the mining frame for a top deck layout
As this is a water-cooled setup, there’s a bit of customizing to do. Time for a dry fit!
Watercooling adds an awful lot of extra work. Positioning things before they’re fixed is paramount and naturally, the frame needs modifying too.
I’ve got some additional 20×20 profiles because I’m going to mount the motherboard on the “top floor”. This means that most of the sensitive stuff is out of the way of the cooling and power gear – also this motherboard has full PCIe slots, so not using risers is an incredibly attractive option!
Dry fitting
I’ve used the term dry-fit because the placement of this rig would be slightly different from a system with a smaller, riser-based motherboard. So I experimented with the placement of all of the components together to see what made the most sense.
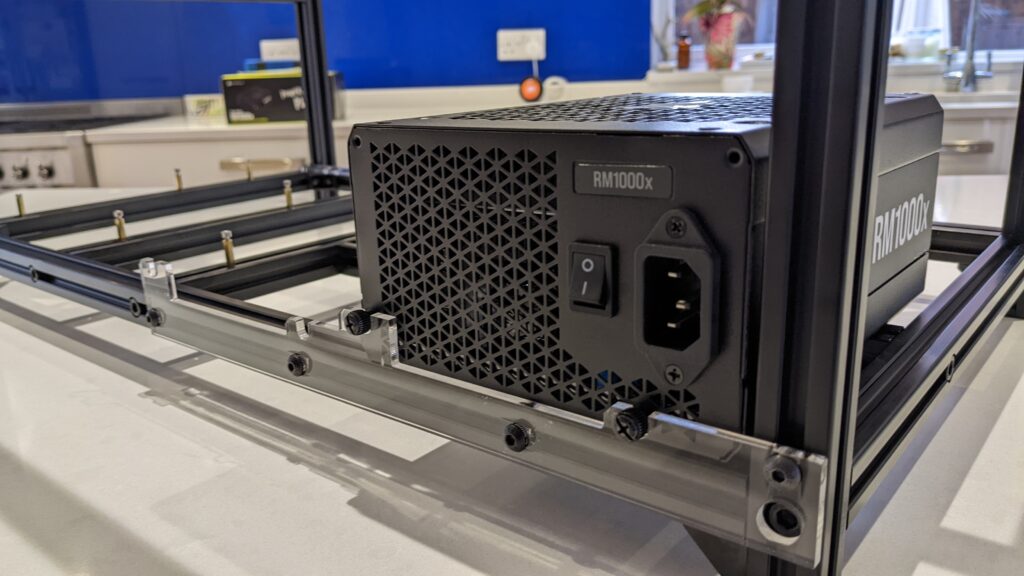
I want the PSUs to be positioned in a way that minimizes the CPU and motherboard cable length – so contrary to the rig kit instructions I’m positioning the PSUs on the opposite side of the frame. This means that the PSUs are mounted directly under the CPU and importantly, directly under the 24 pin motherboard power and CPU sockets.
Would you believe that moving the PSU bracket mounting position means you have to drill new holes? It’s not a case of flipping it around as the rear screw hols on these PSU aren’t symmetrical. Time to drill some new holes.
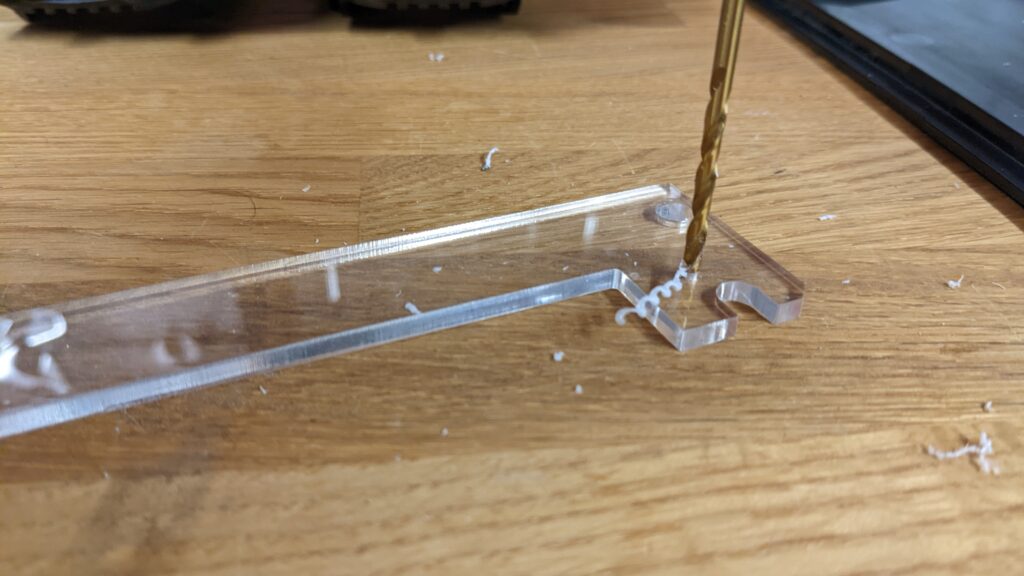
Drilling the acrylic bracket took me right back to workshop class at school. It’s brittle stuff, and unfortunately, I had a tiny crack when drilling. My best advice is don’t use a huge amount of pressure and drill a few pilot holes first, or fabricate a better bracket from scratch!
With the PSUs mounted in place, I could make a start on loosely positioning the rads and pump:
Adding two extra profile sections for motherboard mounting
Just in case you decide to try this at home, the required width for an extra profile is 600mm. I added 2 extra profile sections to mount the motherboard on risers:
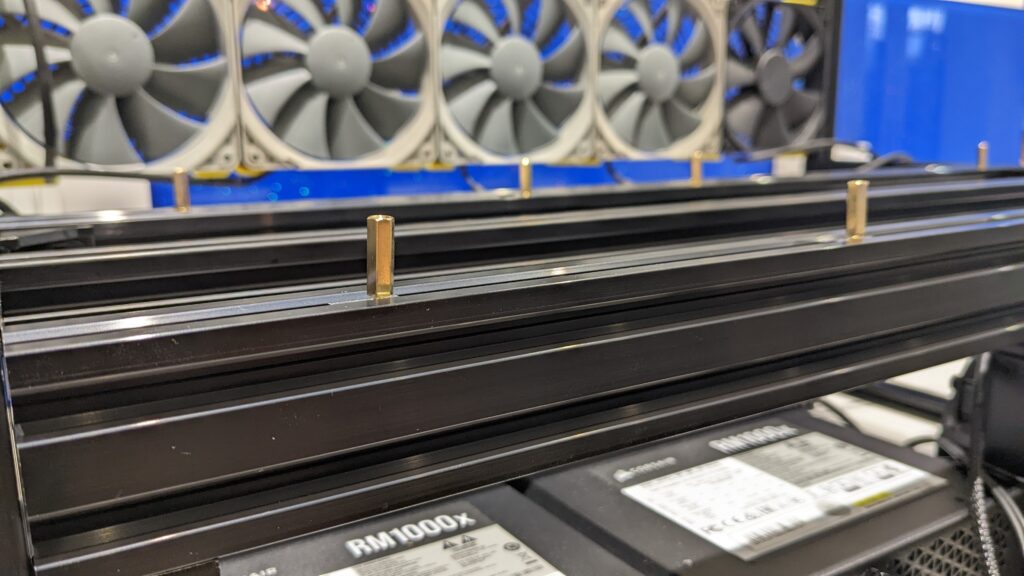
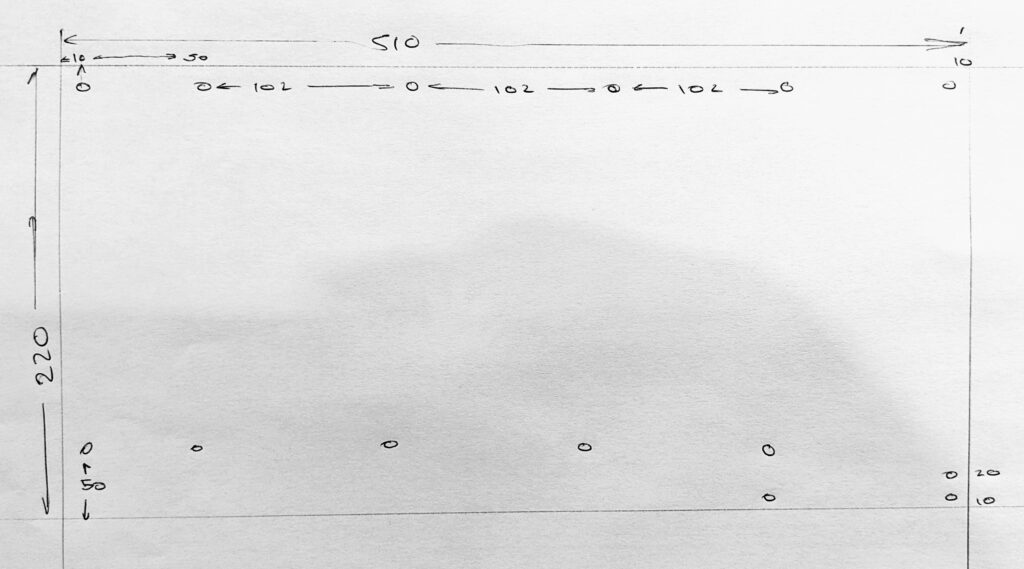
Basically, you need to use every hole available to mount this board if you don’t want it to flex too much. It has a 510mm width and a 220mm height. The mounting holes are spaced out reasonably evenly, starting from 10mm in the top right corner – then they’re 102mm apart. Getting this right was a fiddly job!
So with all that done, here’s the motherboard sat on top of its risers:
Time to do some plumbing!
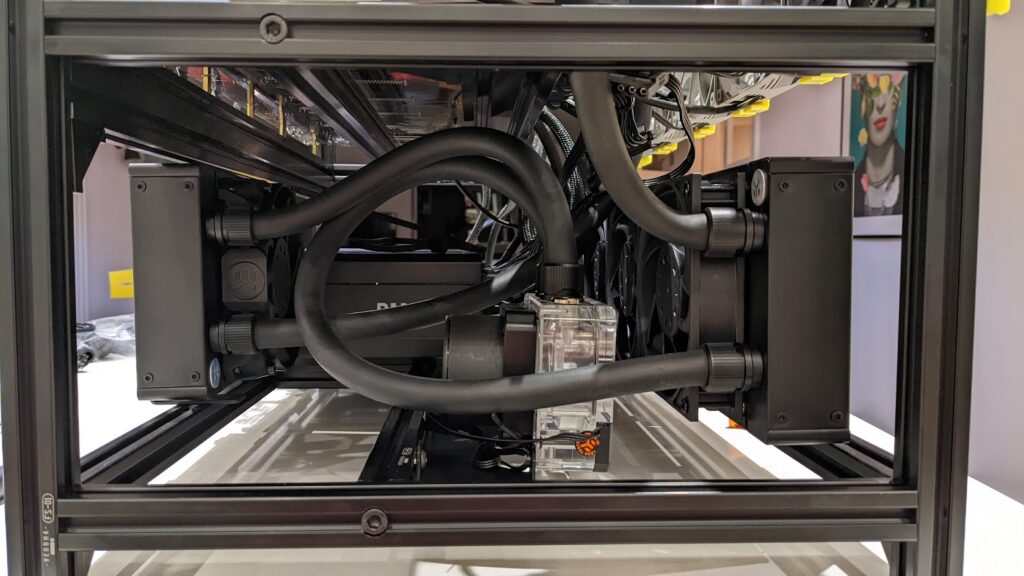
Adding the watercooling
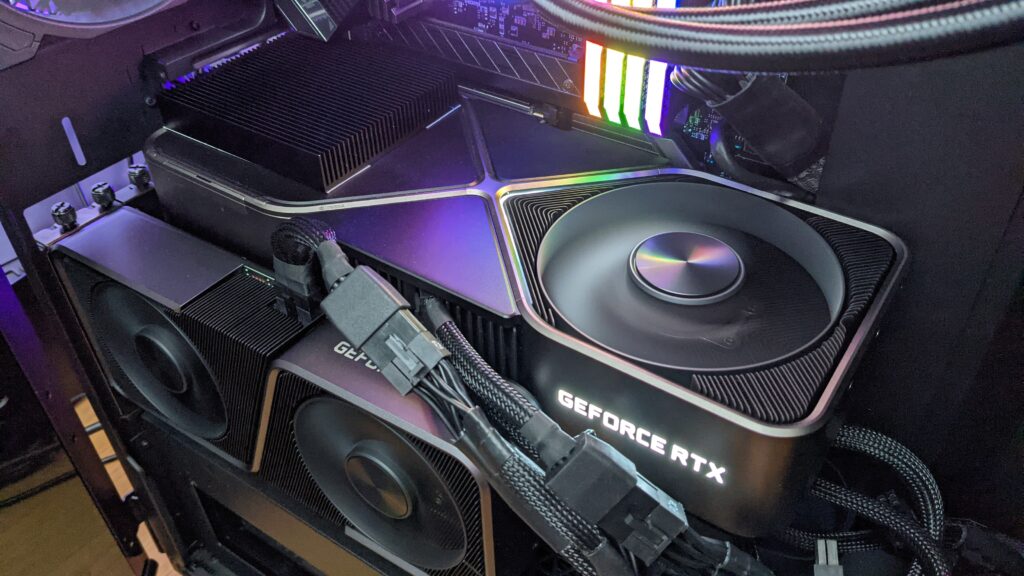
Straight up, I’m not completely happy with the layout of the GPU cooling. It all works really well, it just doesn’t look as nice as I’d hoped.
I chose to build a serial loop for my setup. It’s simpler for a beginner and, as my research tells me when you’re comparing the performance of a series to a parallel loop what you gain in temperature reduction, you lose in flow rate – as I understand it the difference wasn’t worth the extra effort. If I’d had a collection of exactly the same cards, I’d have gone for parallel, but as I learned later the card sizes were so different that I had to make some huge compromises on the GPU deck:
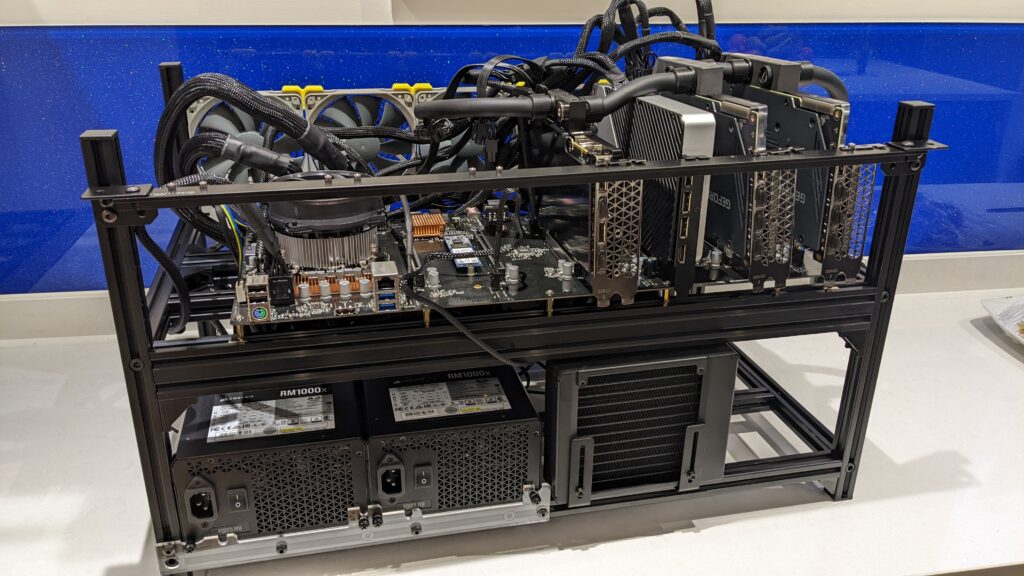
I really wish I could have found two more of those Zotac Arcticforce cards – they’re the best performers in this rig; and, had each card body been precisely the same I could have connected them so much more neatly. As you can see, It was struggle getting directly to each card so I had to loop over card number 3 (from right to left) into card 4, and then into card 3. Really not ideal and a huge lesson learned.
I really don’t see how this could have been don’t much differently without losing access to a PCIE slot. It looks pretty cool from the front:
Plumbing everything in a simply a matter of cutting the right cable length, making sure the cut is clean and fits squarely onto the compression fitting:
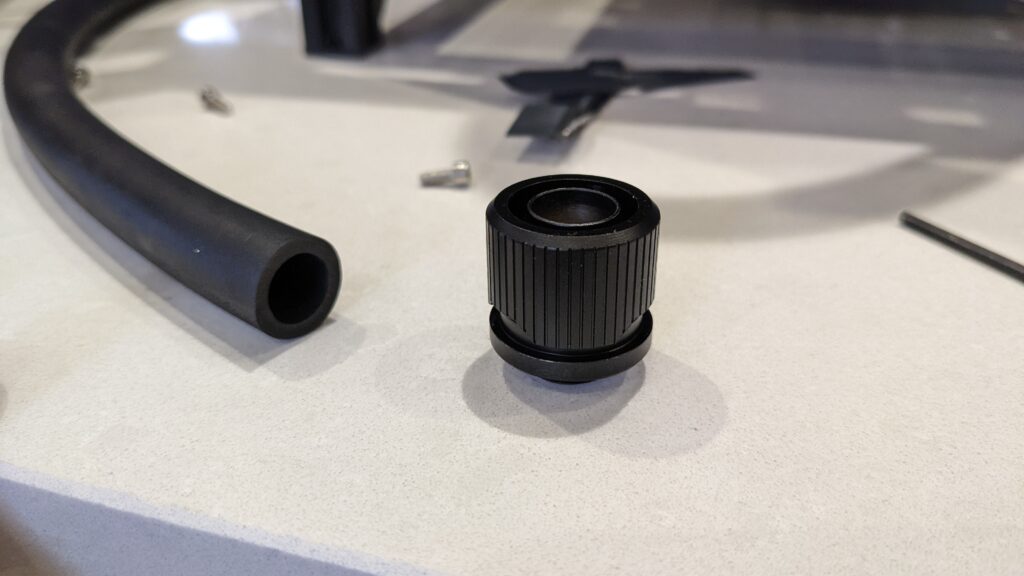
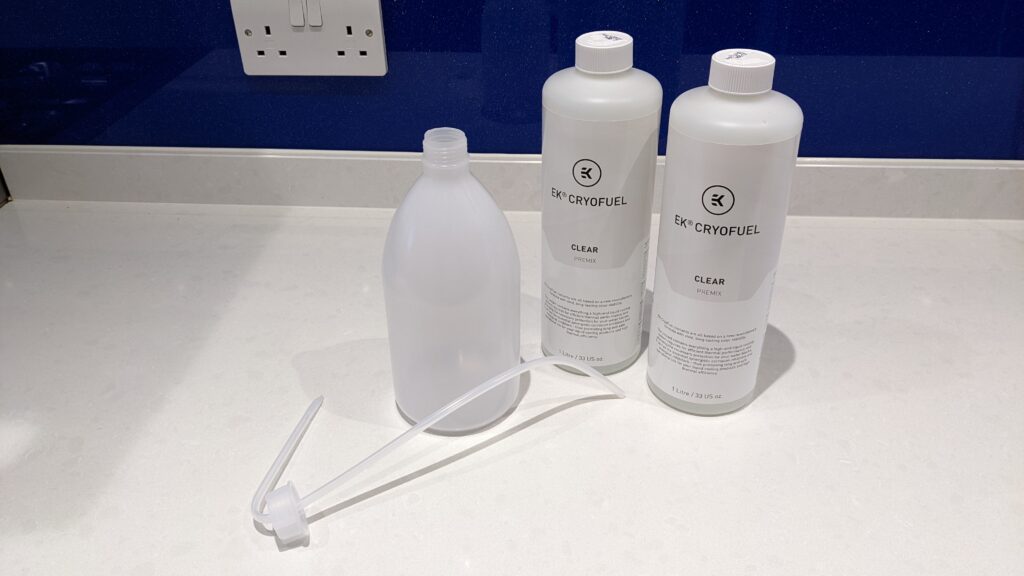
Once you’re all connected, it’s extremely wise to use a separate PSU to run the pump for a few hours to check for leaks (I had none, I’m delighted to report). I used EK Cryofuel and a filler bottle:
Filling takes some time and patience because air gets trapped all over the place. It’s best to fill while running without letting the pump run dry. Occasionally, seal the pump filler and hold the rig at different angles to help the air find its way around. You’ll know when you’ve done when the pump doesn’t need topping up anymore – although this actually took over a day, so just keep an eye on things:
It also helps to squeeze the pipework on and off, again this helps the air find its way around the system.
Once you’re happy, go ahead and boot your computer (not forgetting to connect the pump power to the correct PSU!
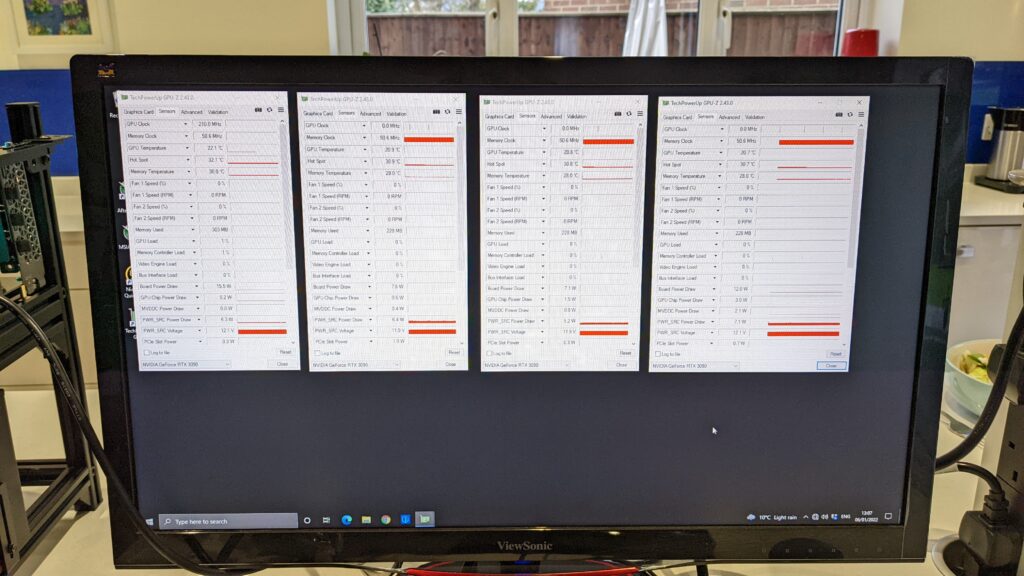
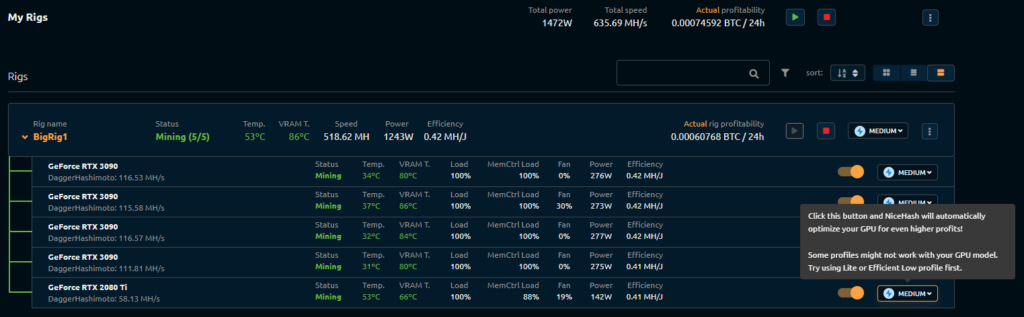
I let the PC boot into Windows and sat and watched the GPUs running at idle for an hour or so to check there wasn’t any weird heat build-up – all seemed well, so I started Nicehash!
Lessons learned from a water cooling installation
If I was building this rig again, I’d do my homework on the water block sizes and work harder to buy the same card. The GPU differences are at the root of basically every problem I’ve had.
I’d use more right-angle compression fittings too – just to make access at each point that much more simple.
For the blocks I bought from EK, I wish I’d bought the “active” backplates – if you’re not water cooling the back of the card then you’re not cooling optimally. This is something I plan to do when I re-work my cooling loop.
But critically I do think water cooling is worth it; the payback period will be longer, but it will pay for itself in the medium to long term.
As I mentioned in the intro, this article was never about the software (as I fully expect to see some harsh words about using HiveOs and so on – also I’ve barely gotten into the OC settings I’m able to use with water cooling. That’s all coming next!
As a first rig I probably bit off quite a lot to chew, but I’ve learned so much that my next rig will be an improvement – and I do plan to reposition the cards or swap them around so the difference in sizes isn’t such a problem. I’m looking forward to seeing what you guys have to say about my build..