
As part of my water-cooled mining rig build, I had to convert my 3090 Founder’s Edition GPU to a water block configuration.
This initially involves stripping down the GPU case, removing and cleaning the mainboard, then re-instating the thermal paste and thermal pads ready to drop into the water block. You could use this article as a guide to replacing the thermal pads with the intention of returning your GPU into the original case or continue on by installing a water block.
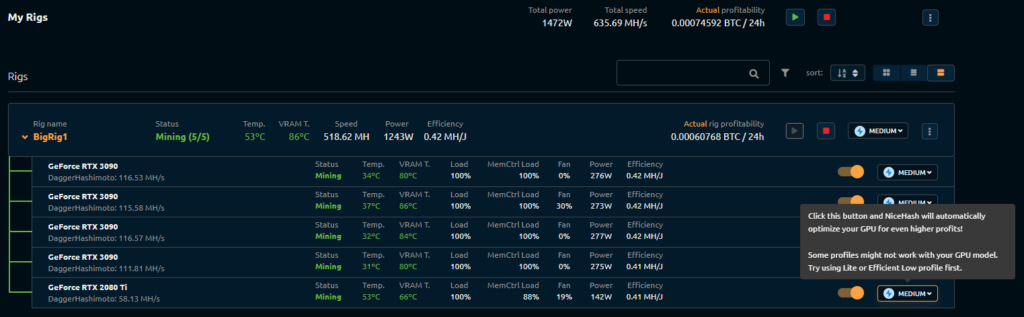
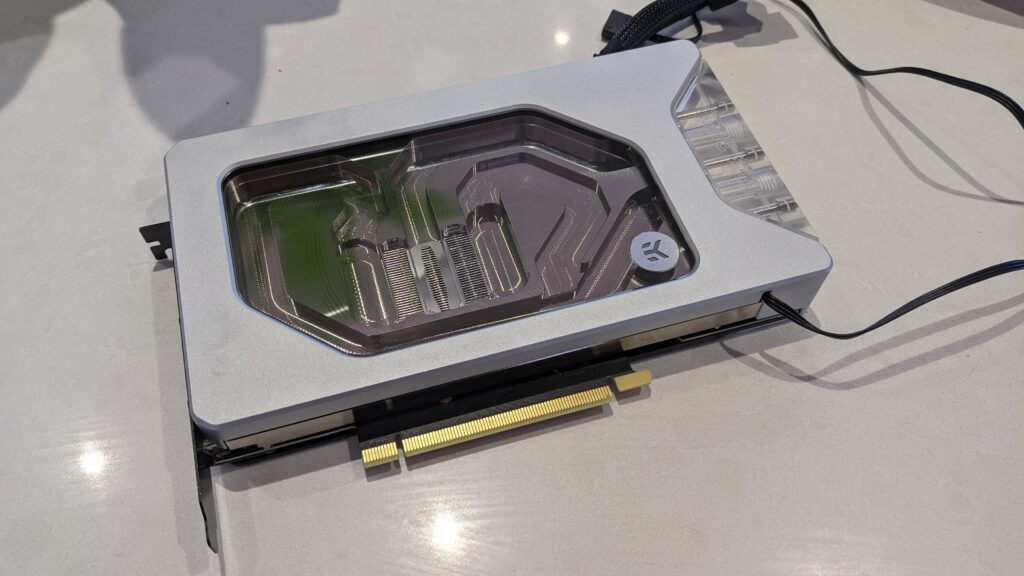
The water block I chose for the Founders Edition was the EK-Quantum Vector FE RTX 3090 – it’s visually very impressive, with some very nice machining and integrated RGB. While I didn’t take the opportunity at the time, I wish I bought the compatible “active backplate” although, looking at the performance, the improvement in cooling is significant:
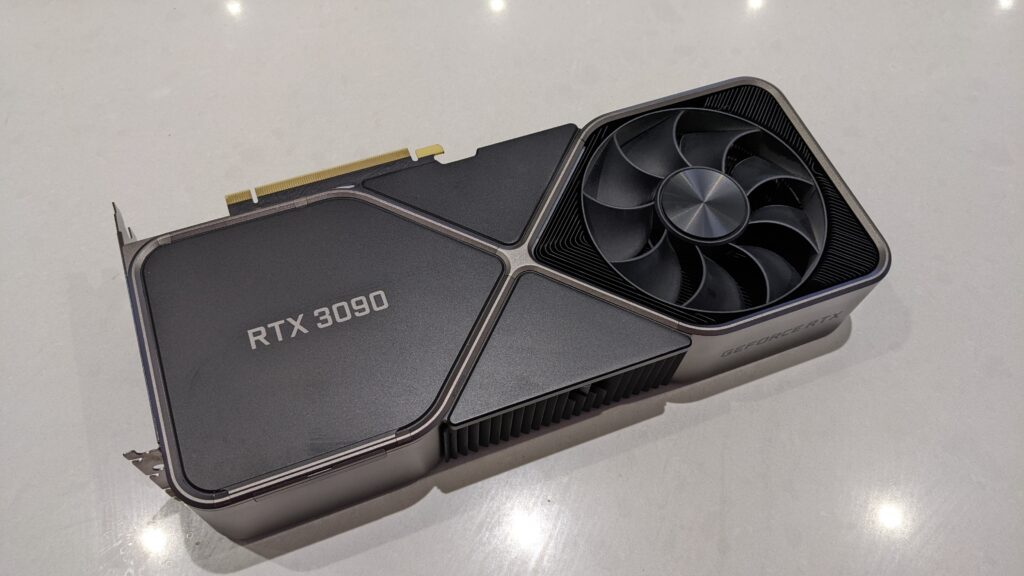
Dismantling a 3090 FE GPU case – step by step
So, here’s our 3090 FE. In this post, I’m going to teardown, step by step, the original case, and then we’ll take care of the thermal pads and grease. Finally, we’ll install into the water block.
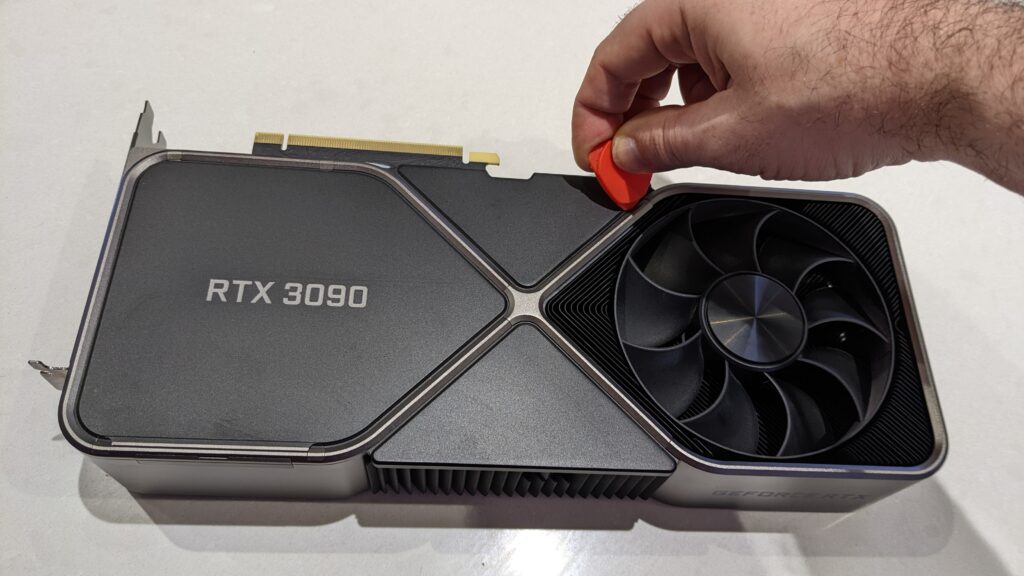
Before getting started be sure to observe static precautions. You’ll need a small Phillips head screwdriver and a set of TORX (size 5 and size 9) screwdrivers. I use a triangular “plectrum” shaped case lifting tool. Plastic case lifting tools mean you don’t do any damage to the GPU case!
Firstly, start by levering off the “X” shaped cover. It uses two pins to keep it mounted, just work along the edges with your case lifting too gently until you feel the cover moving. By working towards the centre you’ll get a feel for how it’s mounted and how much force you need to use:
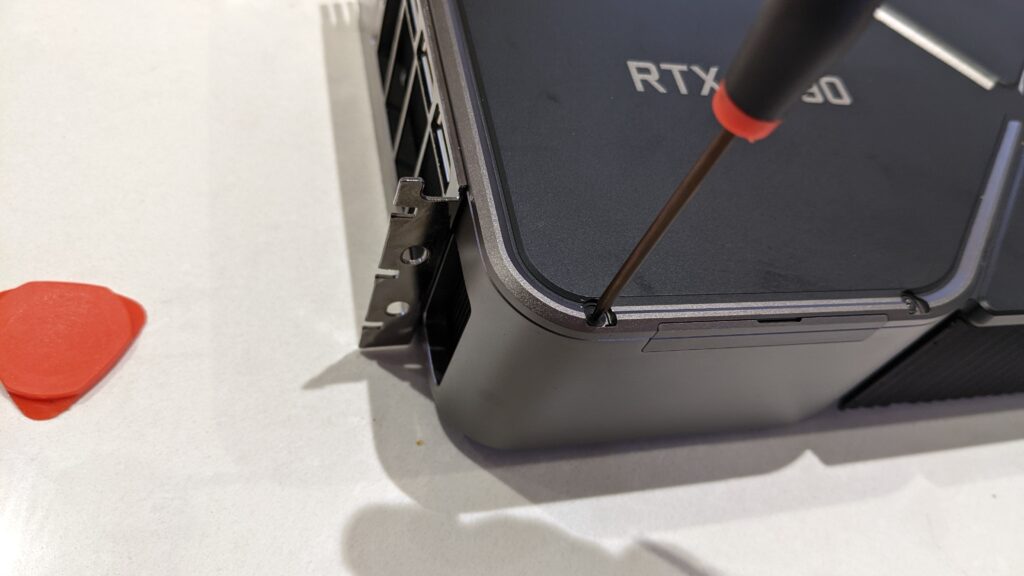
Next, remove the little magnetic screw covers with some tape. I use the tape to keep them together safely – don’t lose them!
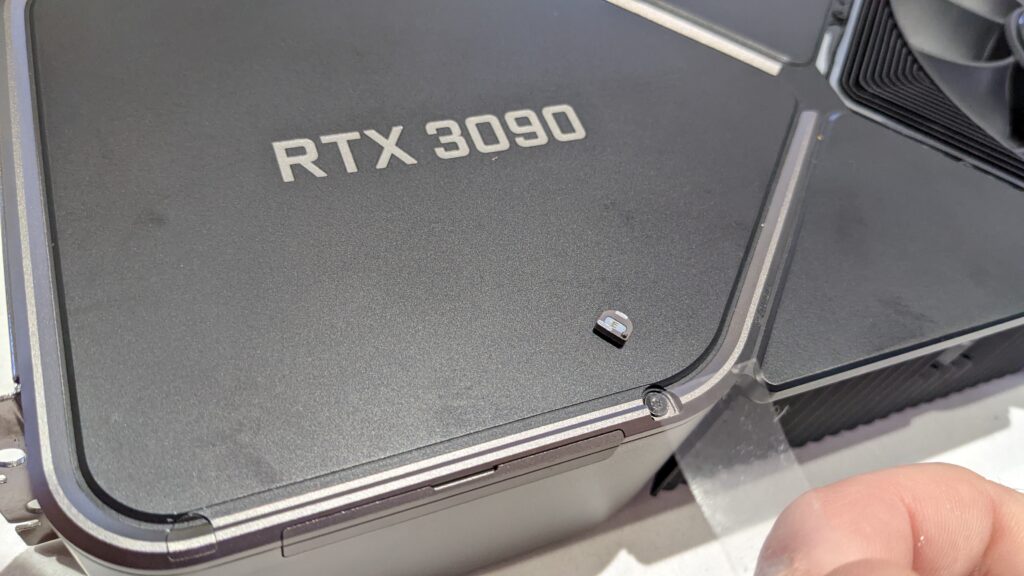
Remove the Phillips screws next to the fan and the Torx screws that were hiding underneath the magnetic covers:
Once the screws are removed, wiggle the case cover (the black section with RTX 3090 written on it). You may need to carefully work around it with your case lifting too, as sometimes the thermal pads can really stick the case cover on!
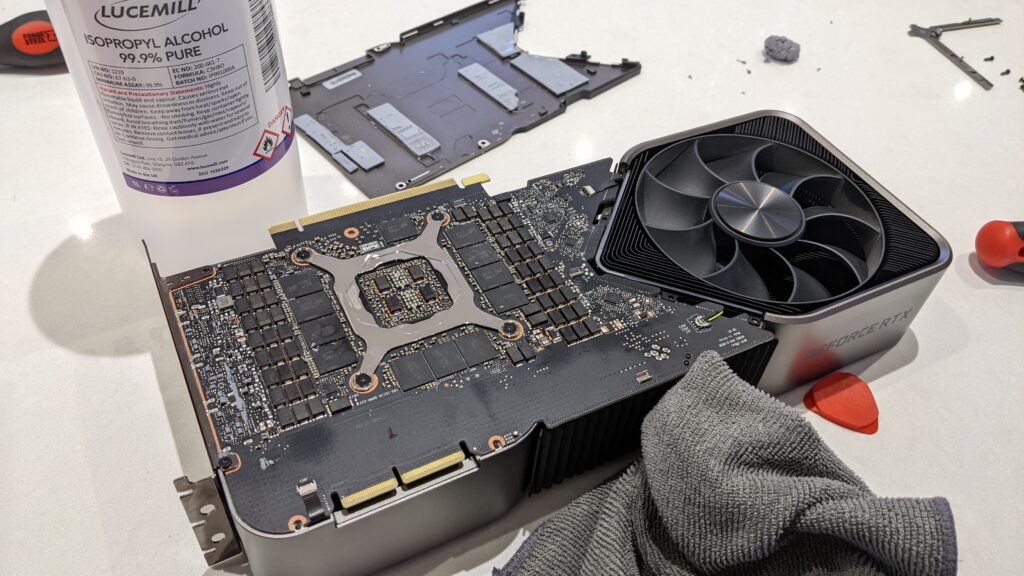
Lifting the lid reveals the mainboard. The thermal pads NVIDIA use are junk, remove them as best you can, touching the board lightly and carefully. It’s probably obvious to say this but don’t use anything that can scratch or conduct to lift and remove the pads – everything should be easy to peel away by hand.
Once you have most of the pads lifted away, use isopropyl alcohol to clean away the remnants of the pads and the thermal paste on the GPU. I use a microfibre cloth. You can be very generous with the alcohol, as it simply evaporates away.
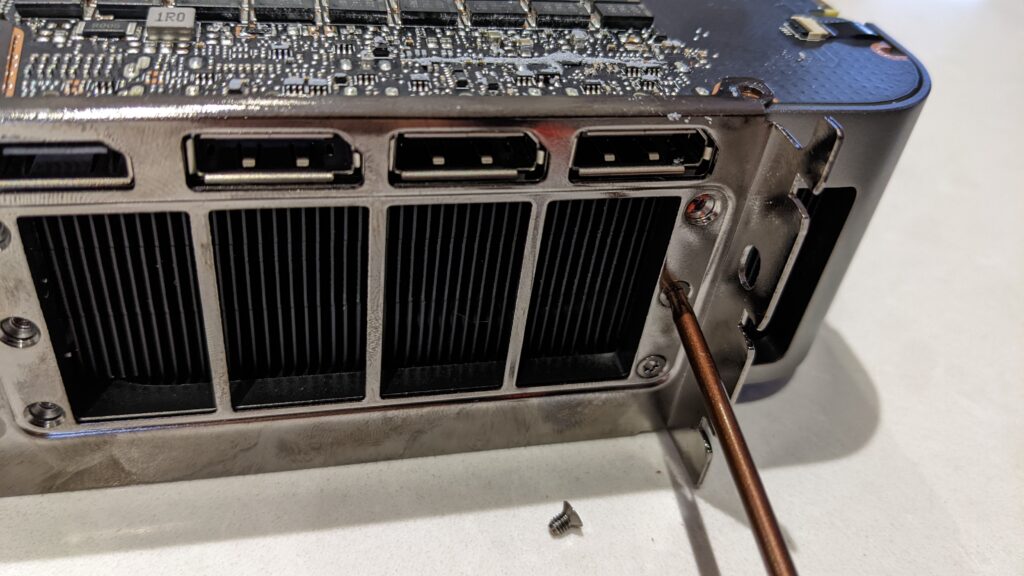
The IO shield can now be removed with 6x size 9 Torx screws on the backplate and two additional screws above that hold the PCB in place. The shield will lift away very easily, leaving the GPU die the only item that now holds the PCB in place.
It’s wise, at this point to remove the three small cables that are mounted on the 3090 GPU board. They use two different types of clamps on the PCB. The first type is easy. Lift the little black clamp from the back and pull the ribbon cable away from the socket:
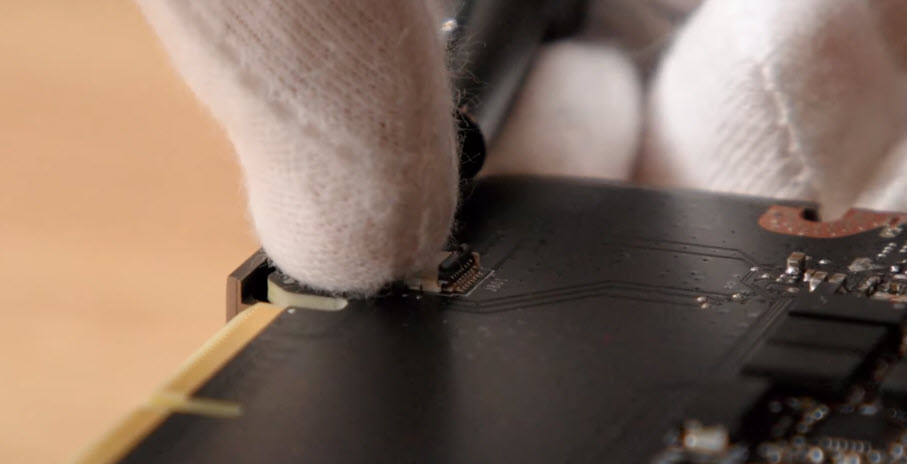
The other type of clamp has a sliding metal clasp that needs to be pushed away from the cable:
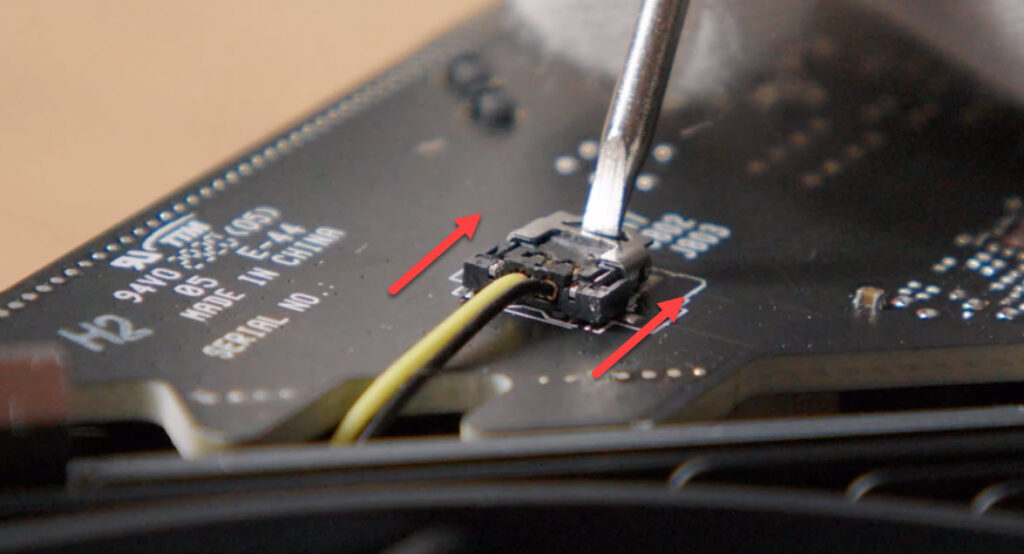
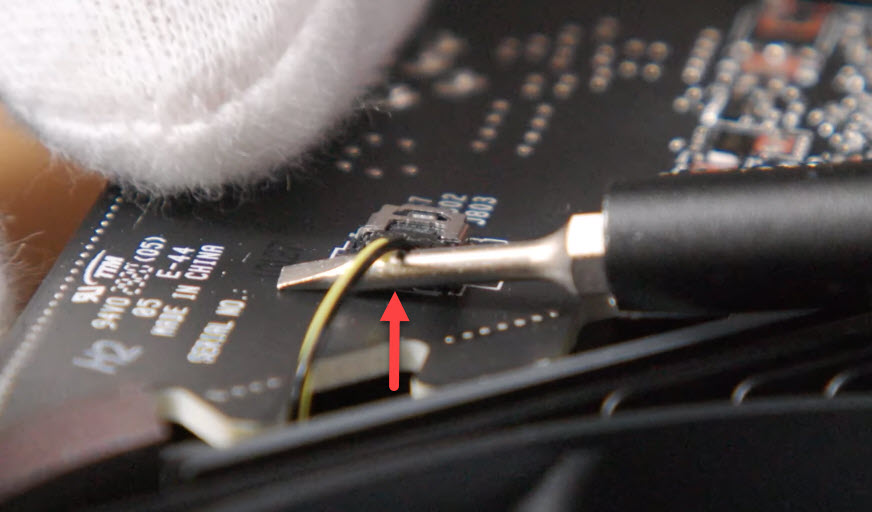
Then, using a small screwdriver, slide the screwdriver gently underneath the cable. Use the screwdriver as a lever to gently lift the cable. It shouldn’t need too much force to leave the socket:
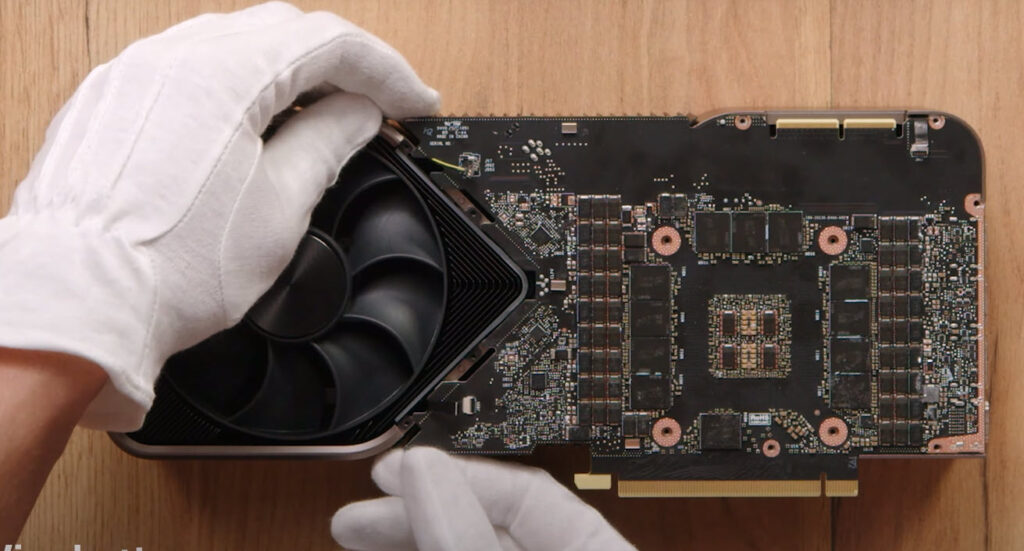
At this stage, you’re ready to remove the PCB from the old case. The PCB is seated into the case by a few small guide pins. It may be quite stuck depending on how much thermal pad was used when it was originally made. Again, carefully working around the edges of the PCB with a case lifting tool will tell you whether the board will just lift out, or if it will need a bit of a wiggle to get free.
It’s best to start from the triangular section of the board, try lifting both points with your fingers:
The key with these things is always patience, use a light force, and wiggle things until they feel like they’re coming loose.
Remove the board and put all of the original components of the GPU case in a safe place. I reassembled mine, and put it back in the original box.
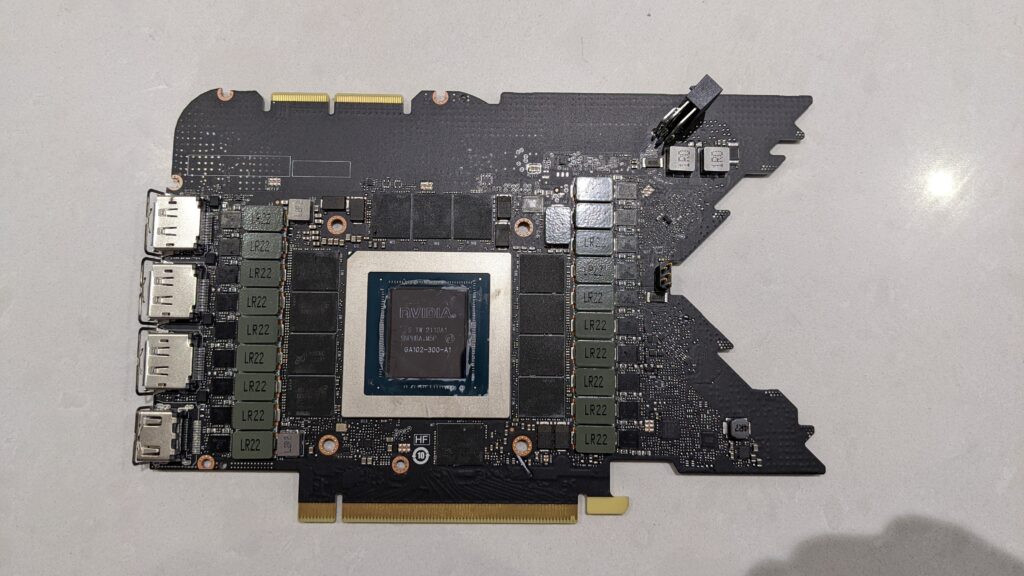
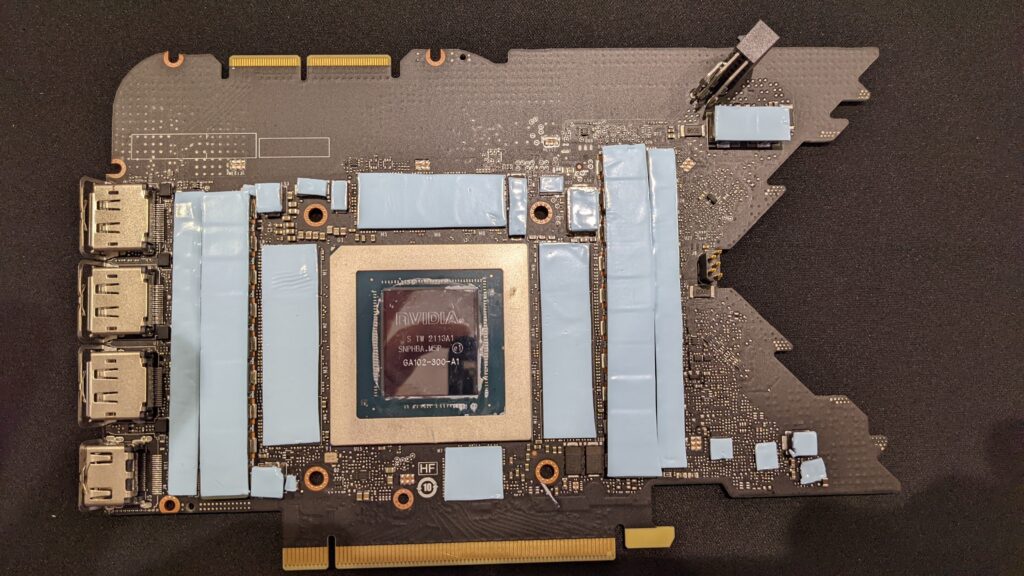
Here is the 3090 GPU side of the board, I’ve cleaned away the thermal paste and removed the remaining thermal pads.
At this stage, you could just replace all the thermal pads and return the card into its original case!
Replacing thermal pads
If you’re planning to replace the thermal pads, use 1.5mm pads on the front and rear. If you’re using the water block from EK, use their pads and paste – their pads have varying thicknesses depending on where the pad is placed.
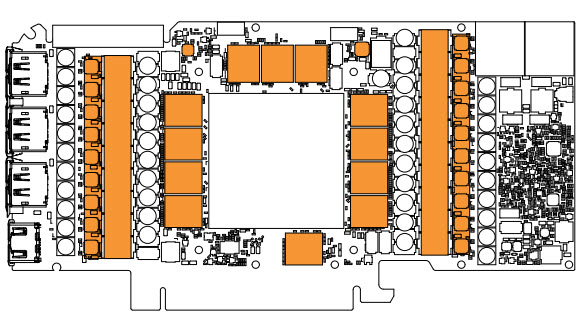
Replacing the pads is a simple case of following the diagram, and cutting the pads into the correct size:
The EK manuals for both the water block and whatever backplate choice you’ve made contain diagrams for you to follow:
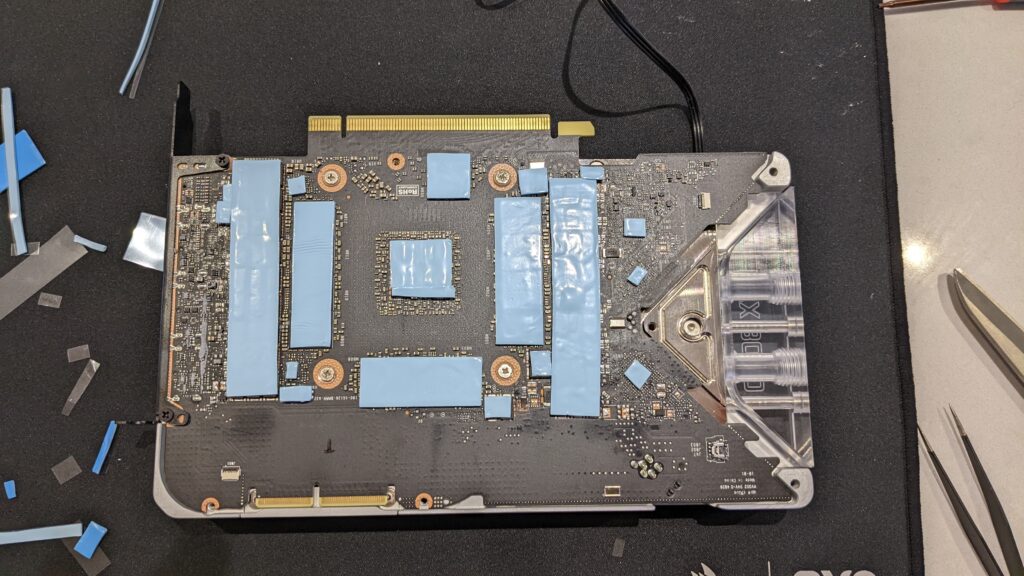
Once you’ve added pads and thermal paste to the GPU side of the board, lower the PCB gently into the water block. You can then add the IO shield and make a start on placing thermal pads on the rear of the PCB, too.
This is the correct layout for thermal pads with or without a water block, just be sure to use 1.5mm thickness pads if you’re putting the board back into the Founder’s Edition case.
Once you’re happy with everything, and you’ve been careful to check you removed the protective plastic from both sides of the thermal pads, you’re good to screw down the backplate:
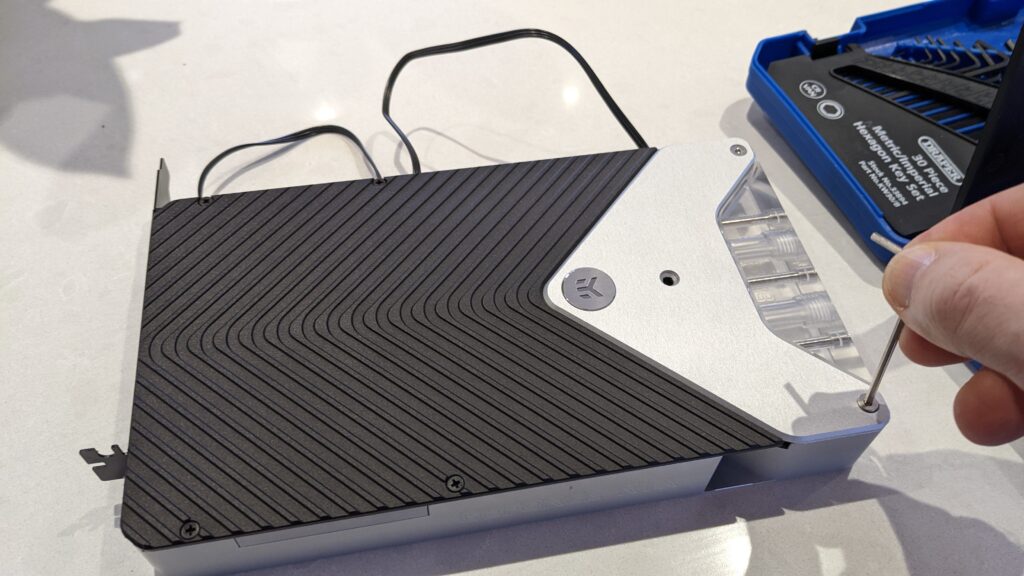
And here’s the finished item, which I think looks fantastic.
Final thoughts
Whether you’re putting a 3090 into a water block or trying to reduce VRAM temperature by replacing the thermal pads, with a Founder’s Edition you definitely have to do *something*. They run too hot, it’s that simple. The original thermal pads fall apart in your hands – they’re incredibly low quality. By replacing the pads alone, you’ll see far more reasonable operating temperatures and hopefully, improve the longevity of your GPU.