
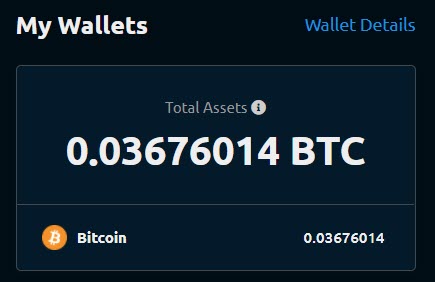
NiceHash is a marketplace for miners and hash power buyers. Using NiceHash, you can get paid for the computing power in your PC’s GPU. So if (like me) you own a gaming PC, you could very easily leave it running while you’re not gaming. You get paid in bitcoin (BTC) to a wallet address NiceHash generates for you which is easily stored in their wallet functionality.
Leave it long enough (a few months with a reasonably powerful GPU) and you’ve likely got enough in the wallet to buy stuff. Retailers like Overclockers accept BTC and you can convert your bitcoin into vouchers on websites like Coingate.
What’s the catch? Very little. The aim of this article is to bring you up to speed in setting up NiceHash’s Miner, optimizing for the best hashing algorithm to run on your PC, safely.
By safely I mean without getting your card too hot! I’m a firm believer in less is more – your gaming PC wasn’t originally intended for mining.
Nevertheless, you can quickly see how at least some of the value of that PC can be paid off.
The only other thing to be aware of is that a powered PC uses energy. But compared to a full fat 6 GPU mining rig, you actually use very little power in comparison. I’ll leave that to you to think about – but my gaming rig runs on around 600 watts – per hour this is 8p. You make more than that back, or I wouldn’t be writing this post.
The cool thing about NiceHash is most of the work is done for you, so it makes “mining” much more accessible for people who aren’t terribly keen to shell out tens of thousands of their hard-earned cash on a mining rig. You’ve already got the hardware and it’s probably doing nothing!
Limited Hashrate (LHR)
I don’t use LHR cards on my mining rigs as I prefer not to mix between the two types of cards.
But mining is easily possible and in some cases, especially with the 3080’s, the hash rate performance of the cards is very close to the full-fat non-LHR equivalents.
This is for two reasons. Firstly, there are now flavors of the 3080 bios that virtually unlock the hash rate on the card by solving a power limiting issue. Gaming performance was inadvertently affected by the hash rate limiting on the EVGA FTW3 cards, so that’s why a bios patch was released which could be installed on your EVGA device via their Precision X1 software.
That bios can work on non-EVGA 3080 ti cards too, with some owners reporting really strong results even outperforming the EVGA cards. Red Panda Mining on YouTube upgraded his Inno3D 3080 Ti iChill X3 to the EVGA XC3 BIOS and gained an even-higher 91MH/s.
As a rough guide, my 3080 to is hashing at 90.6 mh/s – not as great as Red Panda but I can live with that! You can flash these cards with NVflash but – if you’re not sure what you’re doing, carry on researching and take your time.
This is why we’re looking at NiceHash Miner first – some of the plugins that are available through the software have really strong LHR unlock capability. NBminer, in particular.
But remember – don’t run before you can walk. It’s good to learn step by step and be patient. There’s a joy in learning these things the right way, gradually finding optimizations while keeping your hardware perfectly safe and un-harmed. I promise.
Let’s get to it, shall we?
How to setup Nicehash Miner:
- Install NiceHash Miner
- Install MSI Afterburner
- Add your wallet address during setup
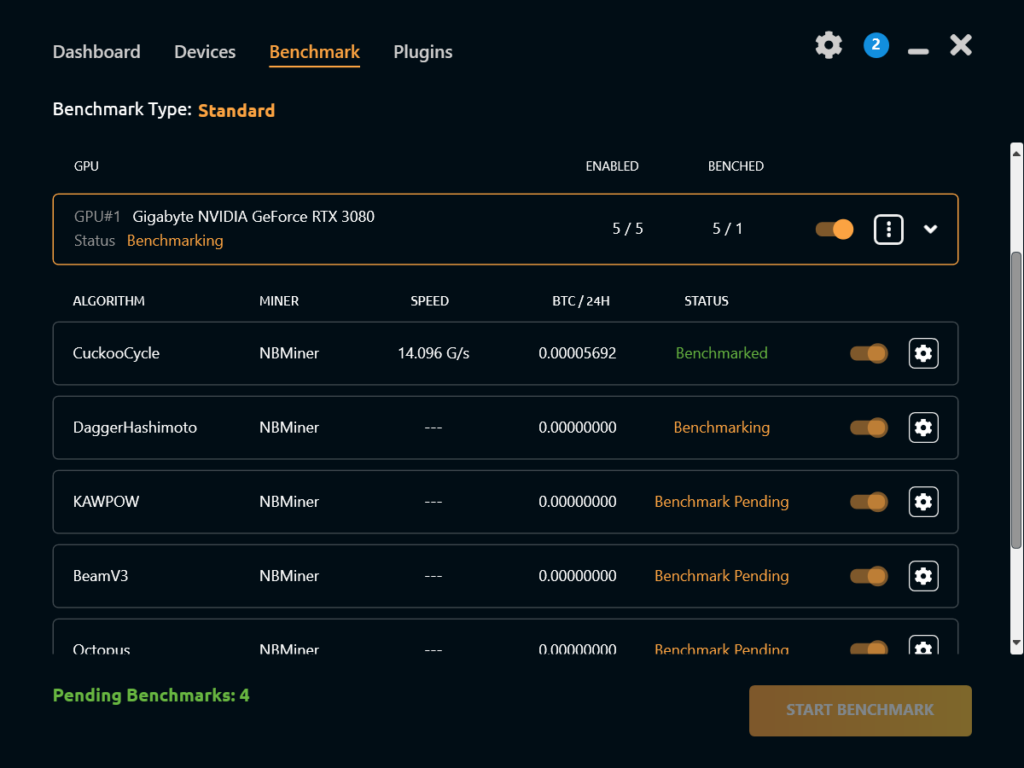
- Benchmark your GPU
- Optimise performance with Afterburner
Install Nicehash Miner
Head to Nicehash.com and register. You’ll need to verify your identity later on, but getting started is pretty easy. Email address, password and submit. You’ll receive a verification code in your email inbox. Enter this, and you’ll find yourself in the NiceHash Dashboard.

Copy your Mining address from the orange box in the top right, which will make installation of the miner software a little easier. Then, click “download miner or add asic”.

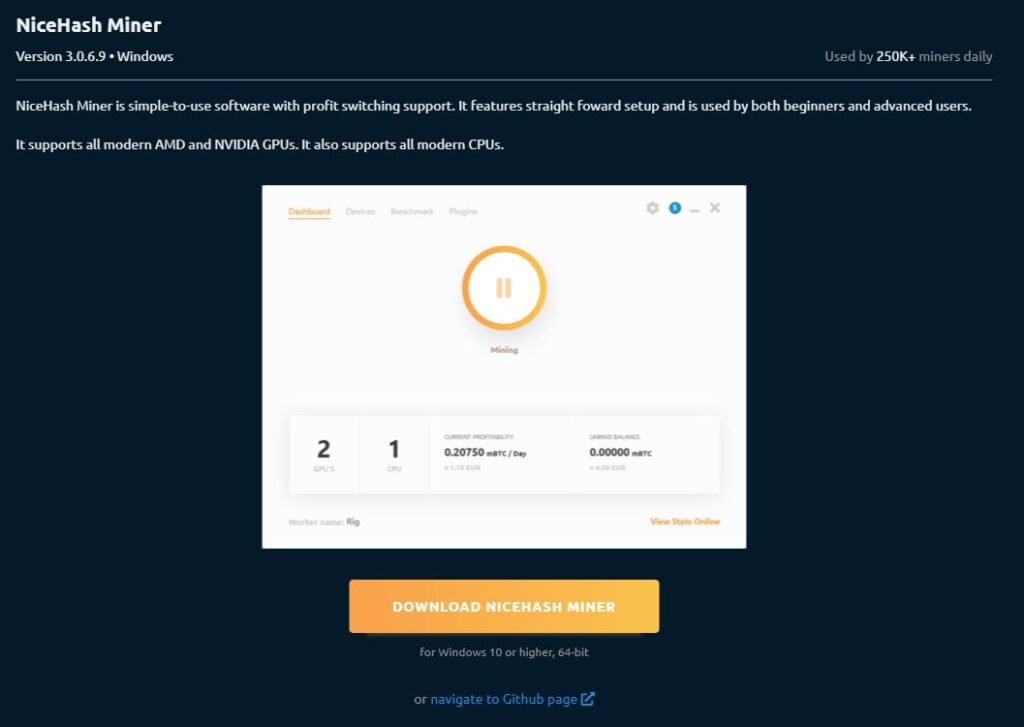
This button takes you to the download page, where you choose which miner you’d like to install.
This guide is intended for NiceHash Miner, not Quickminer which I actually use on my main mining rigs.
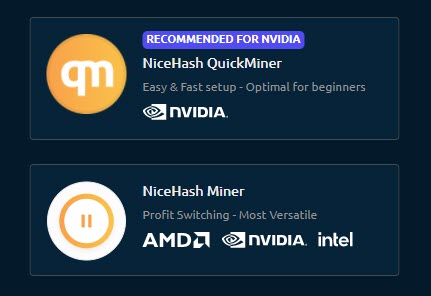
Select NiceHash Miner, and an installer will download.
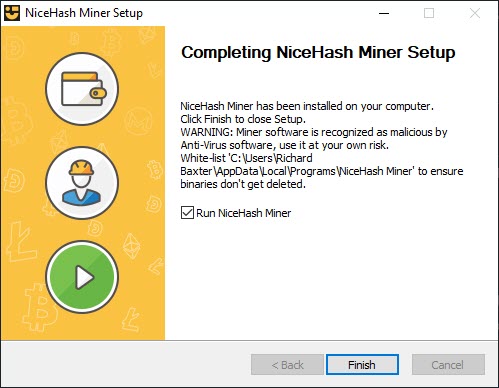
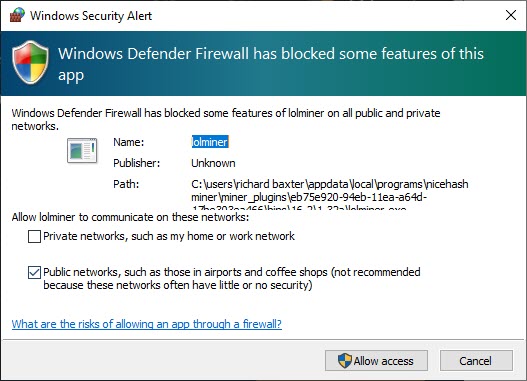
If your browser / PC reports the download as a virus, follow these instructions on the NiceHash site. Once installation has finished, you’ll see this dialogue:
As an aside, I use Malwarebytes which identifies NiceHash as a virus too. It’s worth creating an exception in whatever anti-virus software you use (if you do use any). Here are the instructions for Malwarebytes.
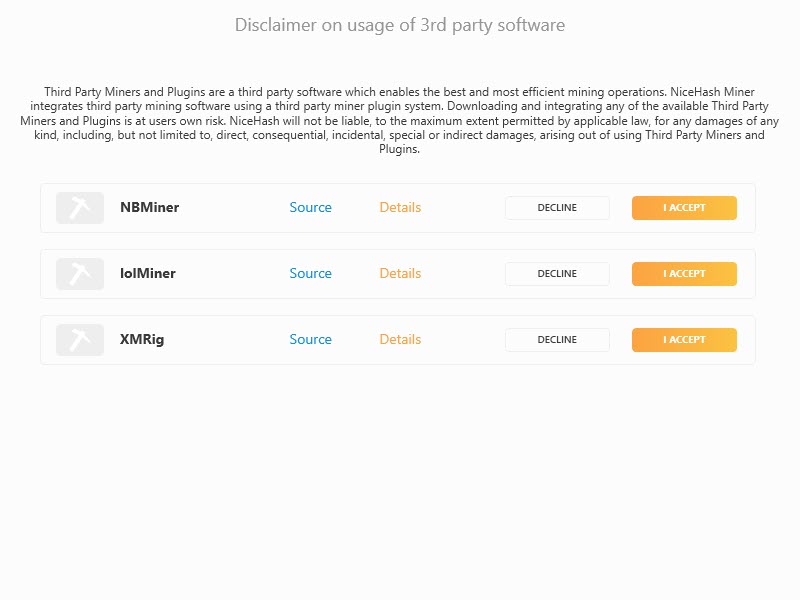
You’ll get a series of dialogues asking for your NiceHash BTC address and agreement to accept a few mining plugins (LOLminer, NBminer and XMrig. Accept them all, you’ll be able to choose what you;re actually mining with later.
Following this, they’ll be a restart and once restarted you can add your electricity price per KW in the settings dialogue using the gears logo in the top right of the window.
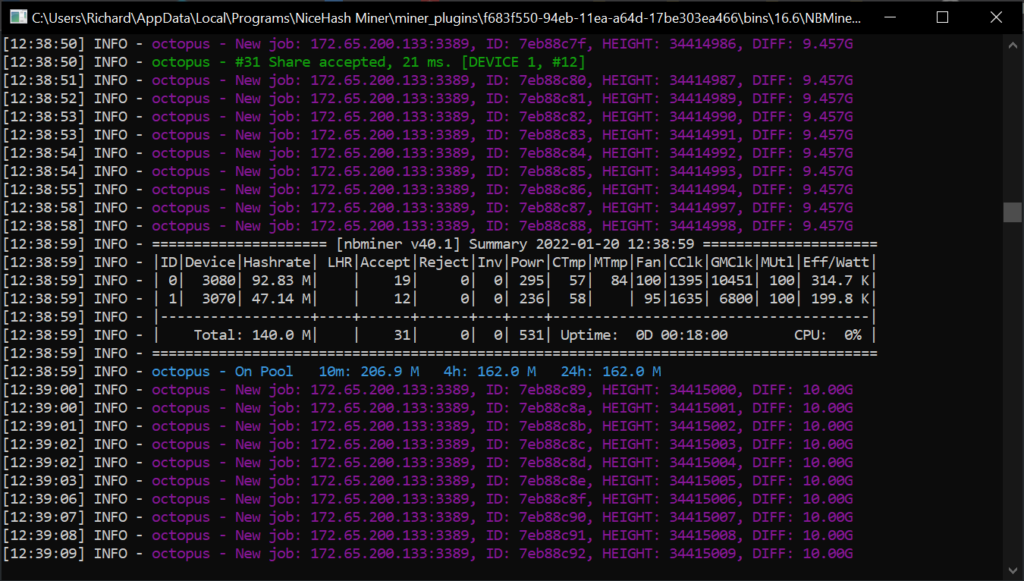
If you enabled CPU mining, that will begin almost immediately. You’ll see a window appear like this:

Just minimize it and ignore – NiceHash will always have some interesting command-style windows running (that’s the actual miner running!) it’s super interesting to watch and you’ll soon learn what it all means.
With benchmarking done, I like to simplify things by choosing the most performant miner plugin, which in this case is NBminer:
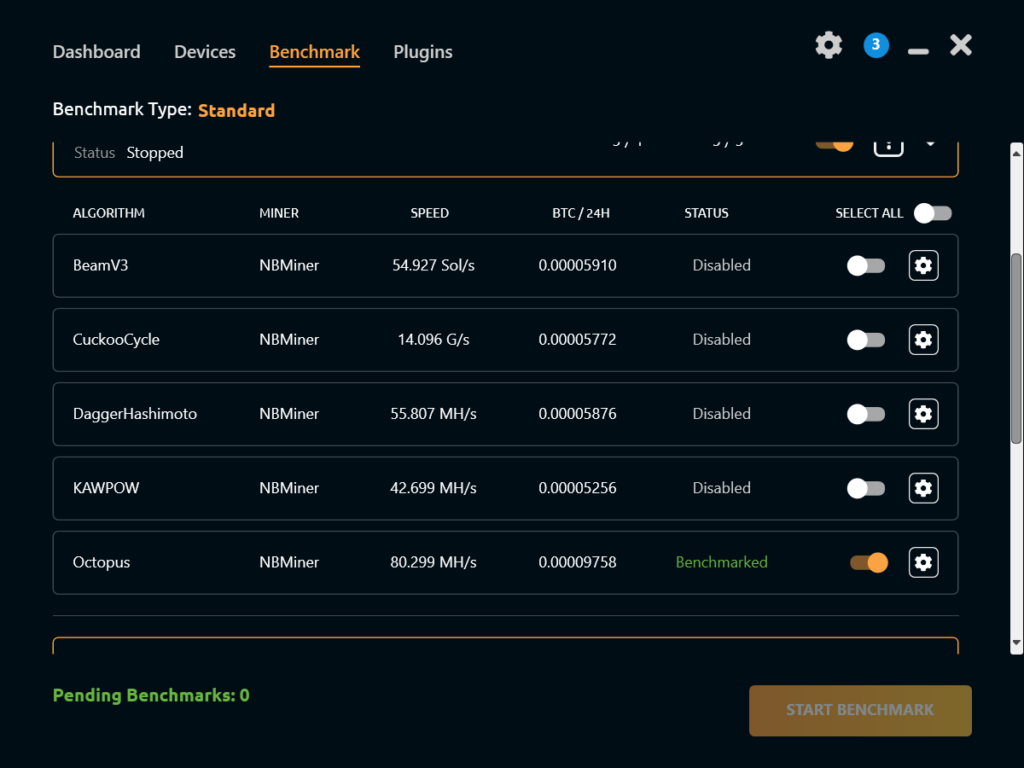
Note that I’ve basically switched everything off except Octopus running on NBminer. You can spend time experimenting with other algorithms and plugins – for me, this works really well.
If you’re running cards with limited hashrate, now is the time to add the LHR unlock into the custom algorithm settings:
Via the NiceHash website, slightly changed for my preferences:
Follow these steps to enable LHR unlock:
- Open NiceHash Miner,
- Navigate to Benchmark tab,
- Select a device you would like to apply LHR unlock to,
- Locate NBminer and Octopus algorithm combination,
- Click on the gears icon,
- Type –LHR 74 or any other supported value in the Extra Launch Parameters text box.
- Close the Custom Algorithm Settings window,
- Repeat the process for other devices.
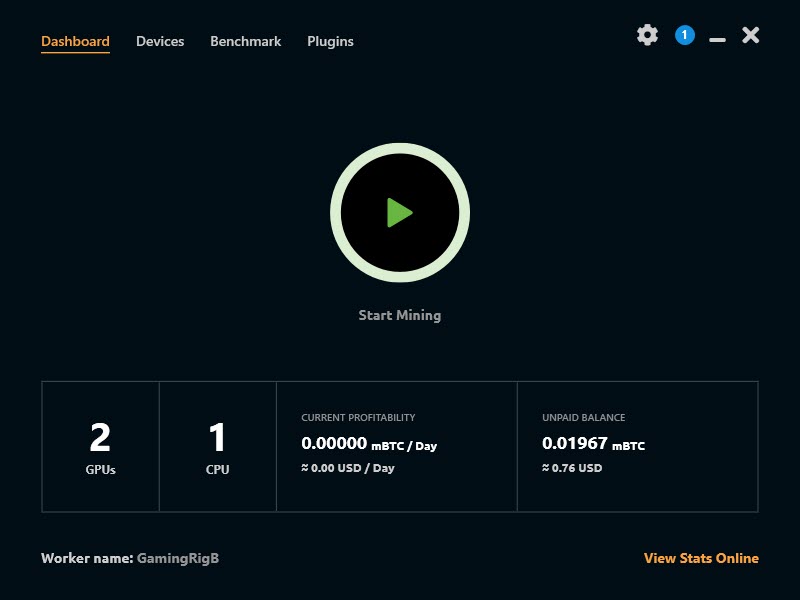
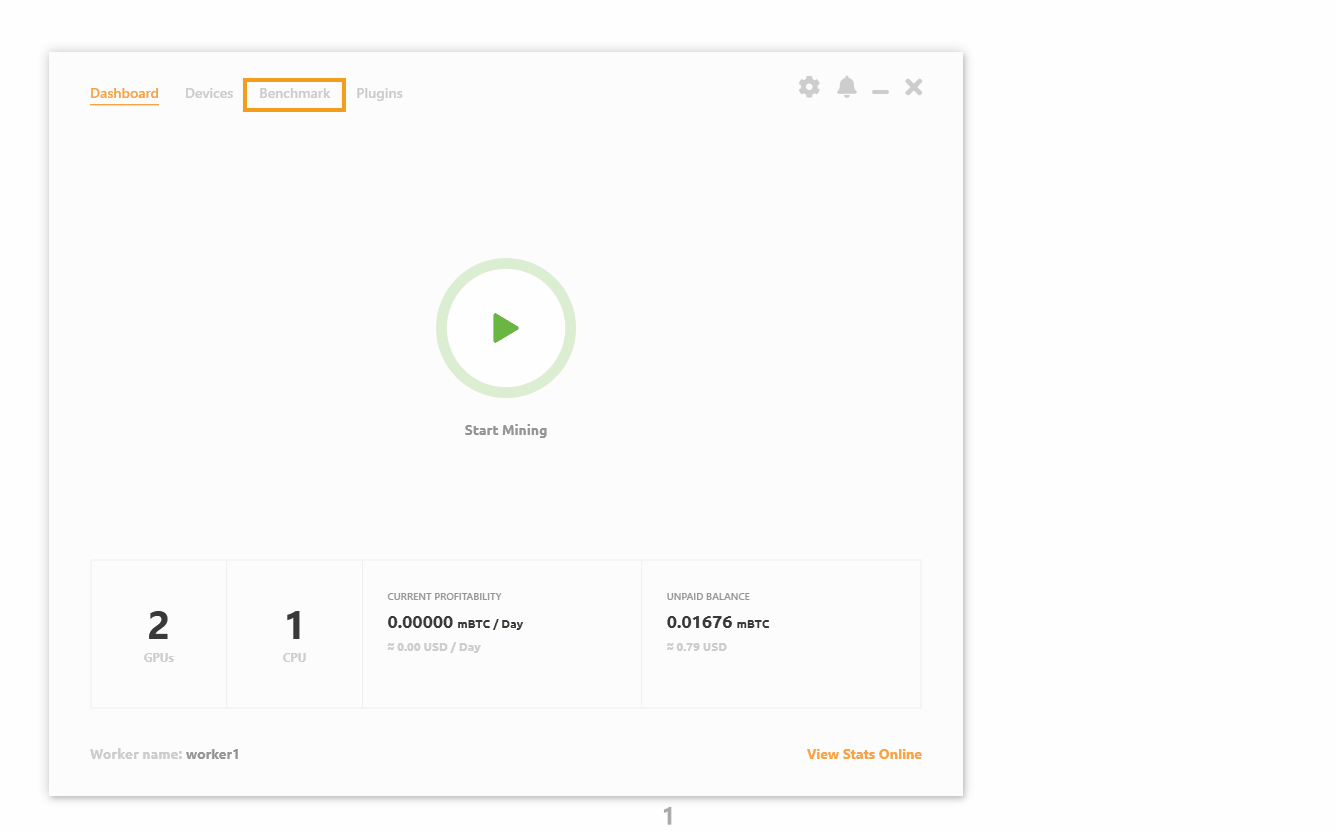
So now Mining is ready to begin, you can return to the dashboard and start the process. Another window will open that looks like this:
I recommend you install GPU-Z from Techpowerup as you can use it to monitor the temperatures of your card.
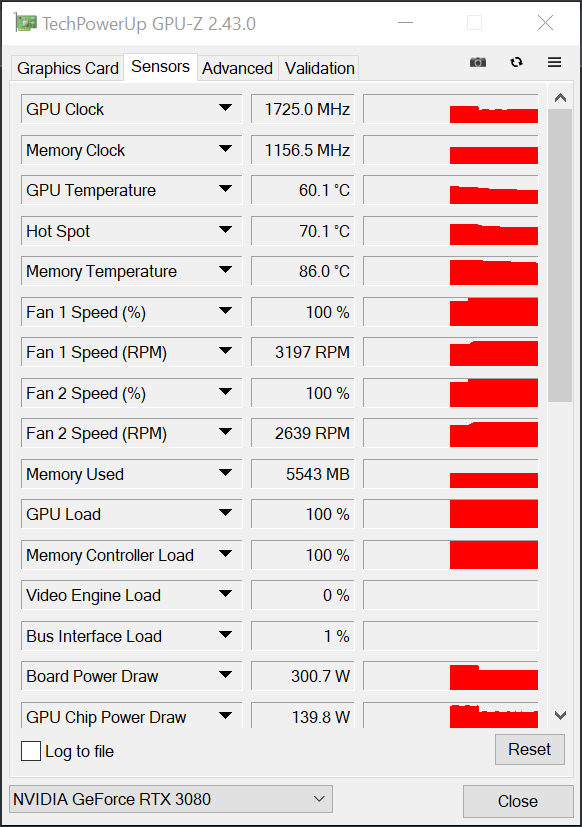
While 86c seems frightening, the spec of the ram on 30 series cards has a higher safe temperature than that. Nevertheless, you can reduce the temperature and actually improve your hash rate with Afterburner.
I’m going to share my settings for the
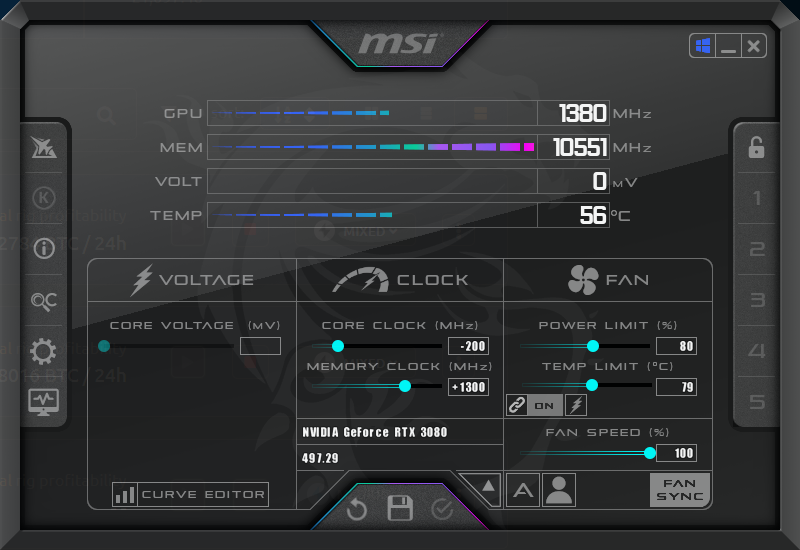
There’s a process behind these numbers. I’ll go into detail on overclocking but in summary, the goal is to get a good hash rate with less power and therefore lower temperature. I usually start the GPU at or around 80% power. If that doesn’t drop the hash rate, I’ll drop it further until the card slows down. It’s easy to find the sweet spot this way.
Then, I increase the clock speed which noticeably improves hash rate. These are safe settings for my 3080 – it’s hashing at over 90mh/s (LHR!) and running at a nice temperature.
Getting this far is daunting at first, but there’s definitely a process. If you want to have Afterburner and GPU-Z running before you start mining, that’s no problem. I prefer not to benchmark with these settings, instead just leaving NiceHash Miner to do its thing.
If you’re unsure of what OC settings to use you can either follow this link for a rough set of numbers or watch this excellent video from Seb’s Fintech channel where he goes into detail on his optimization process: